
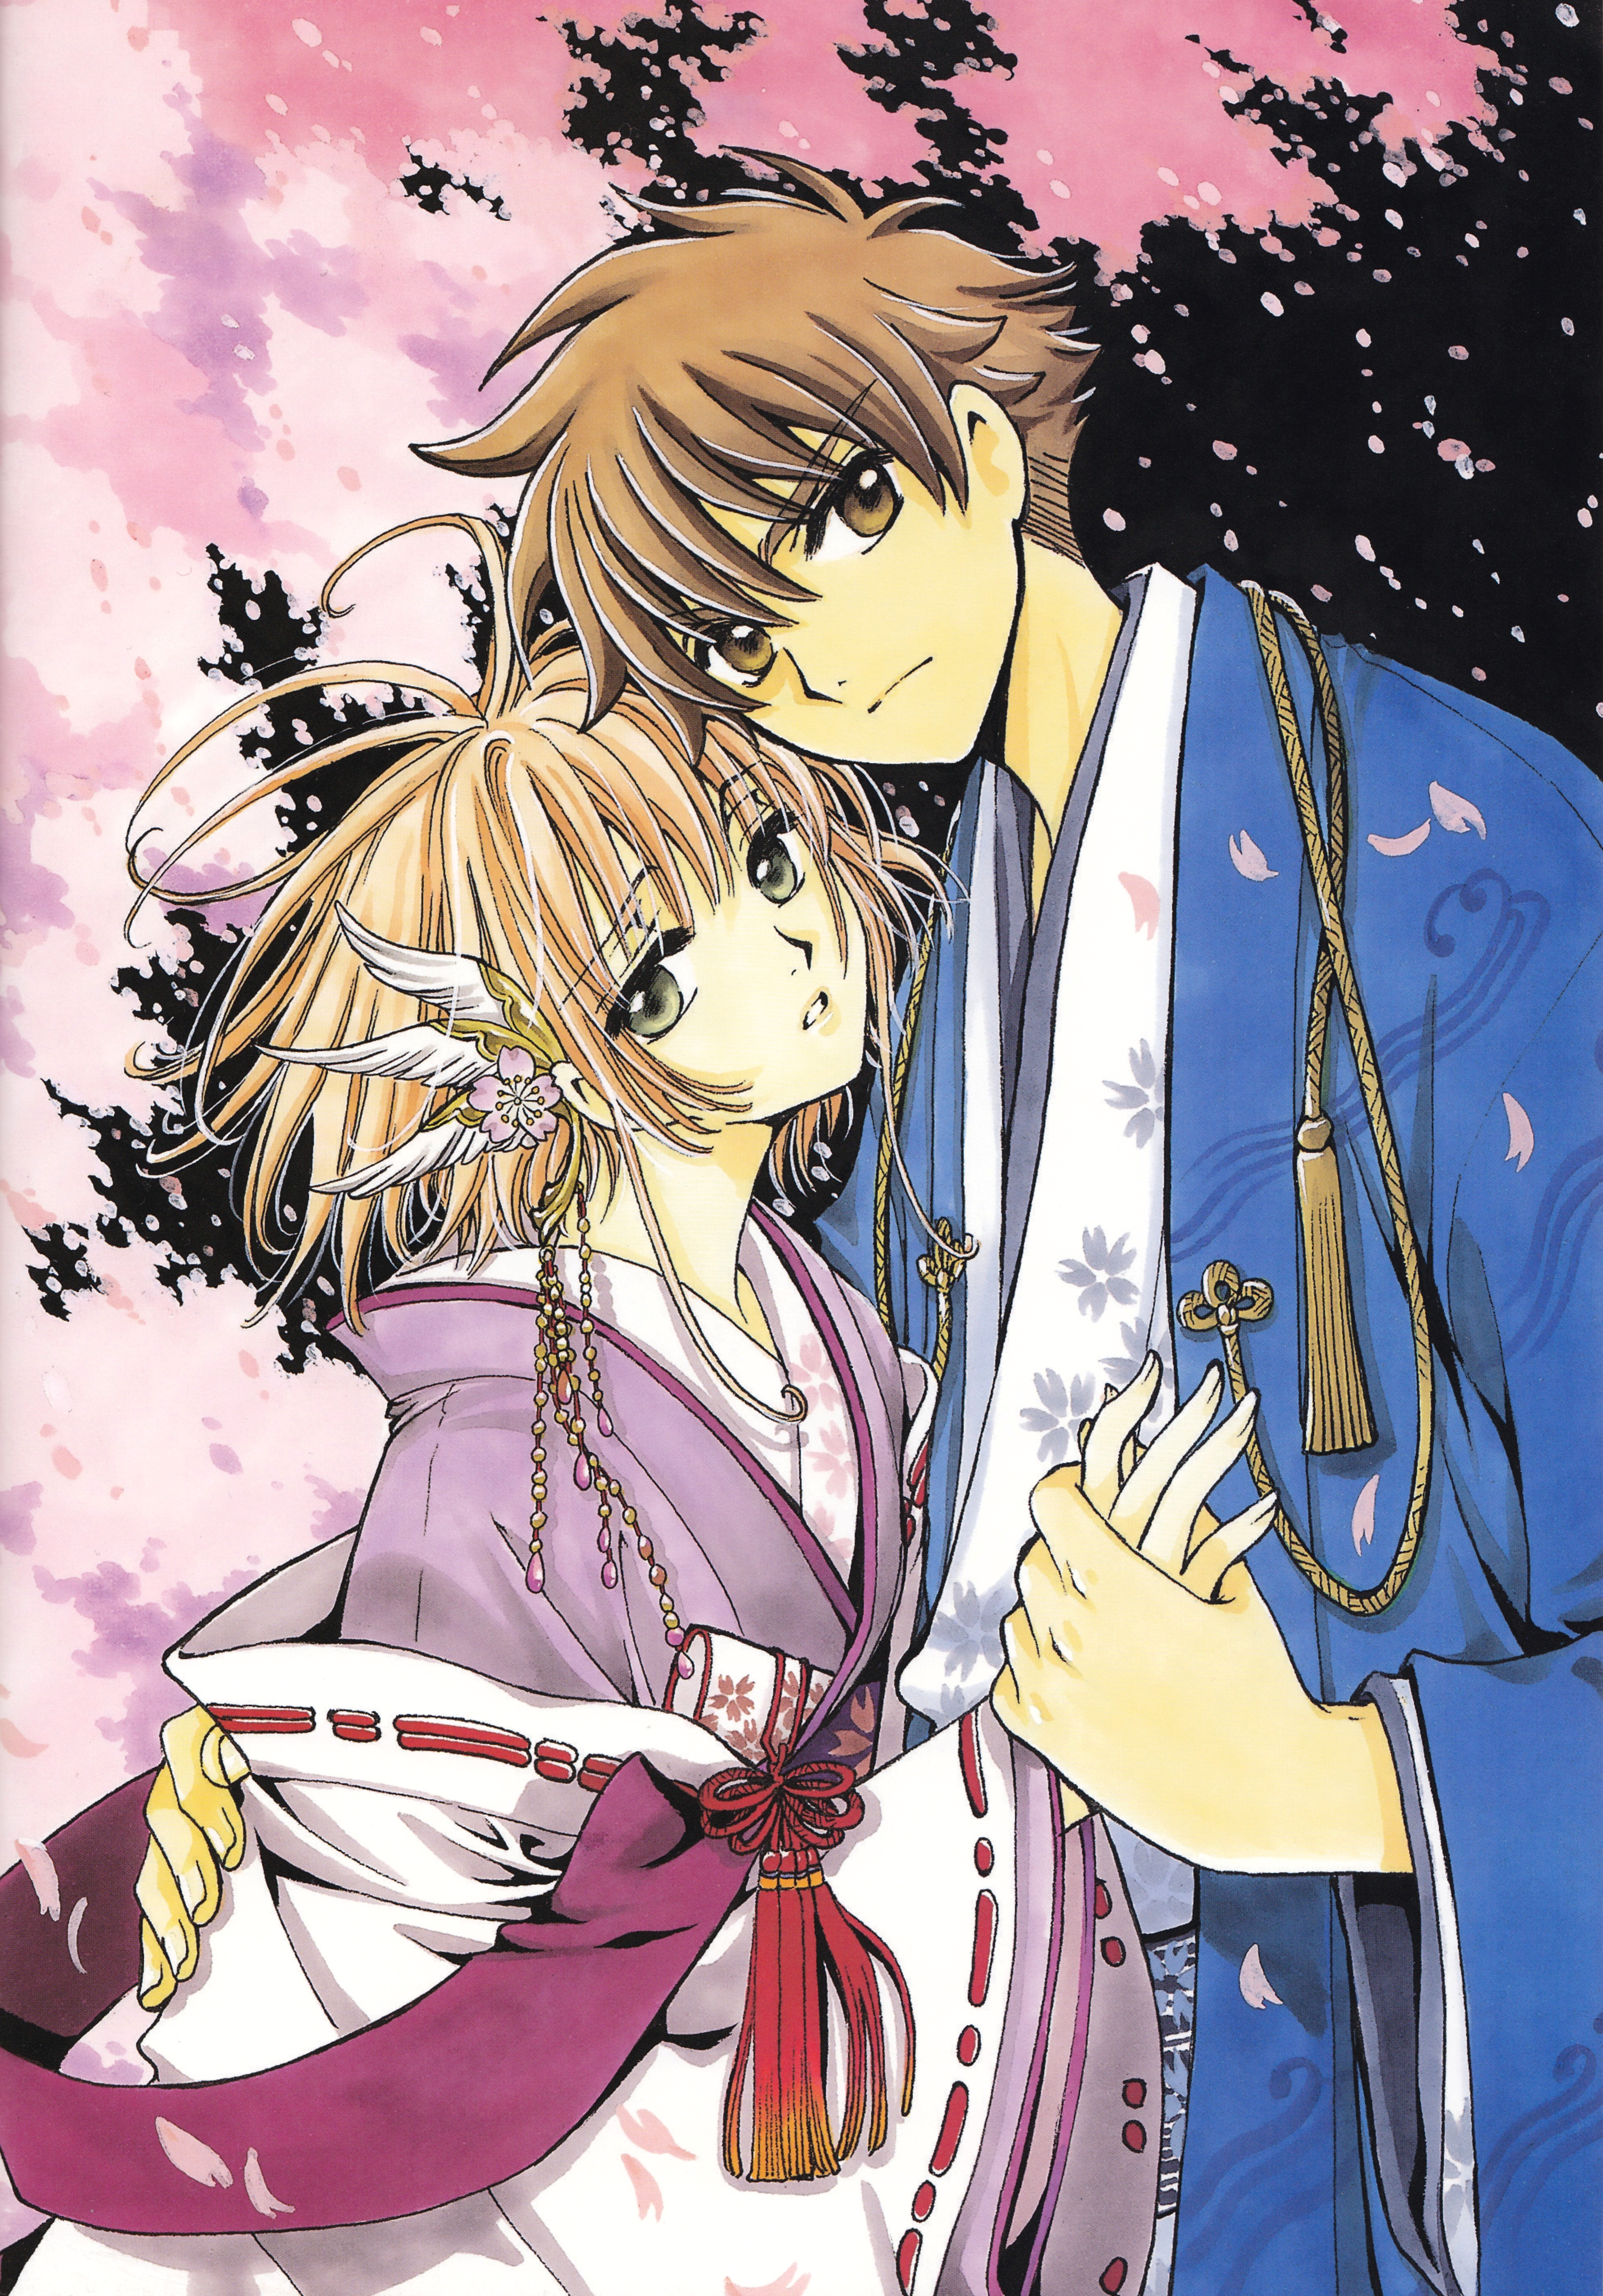
As the weeks to Katsucon 2019 counted down and real-life responsibilities piled up, Lettelle and I doubted our abilities to finish the much more intricate versions of Syaoran and Sakura we had originally planned to make. Fortunately, when hunting through the Tsubasa artbook archives, we stumbled upon a yukata-esque version that looked much more manageable to complete in the time we had left!
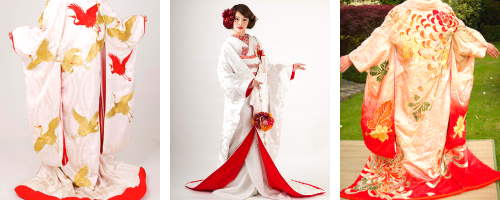
That is, until… I realized Sakura wasn’t wearing a regular yukata in the reference. She was wearing an uchikake: a traditional Japanese wedding robe. Suddenly, my work for the project doubled — but in the best of ways! After thorough research, I decided this was the perfect opportunity to tackle some intense silk painting. My last intense silk painting project happened four years ago, and I definitely wanted to see if my skills had improved a bit since then!
DISCLAIMER: I do not intend for this post to be a proper tutorial. I’m not an expert in silk painting and am still very much learning the technique! However, I documented my process in hopes that it helps other cosplayers who may want to attempt silk painting, too.
Preparing the Design
The reference cuts the entire lower half of the robe and sleeves off from view. This meant I had complete creative freedom to add whatever designs and details I desired! Because the official reference didn’t provide any inspiration, I instead turned to photos of actual uchikake, along with doing research on their traditional construction methods.
While I didn’t have the time and money to create a full brocade robe, complete with hand embroidery, I was determined to create one that emulated the nuance of a traditional uchikake… but definitely with a cosplay interpretation.
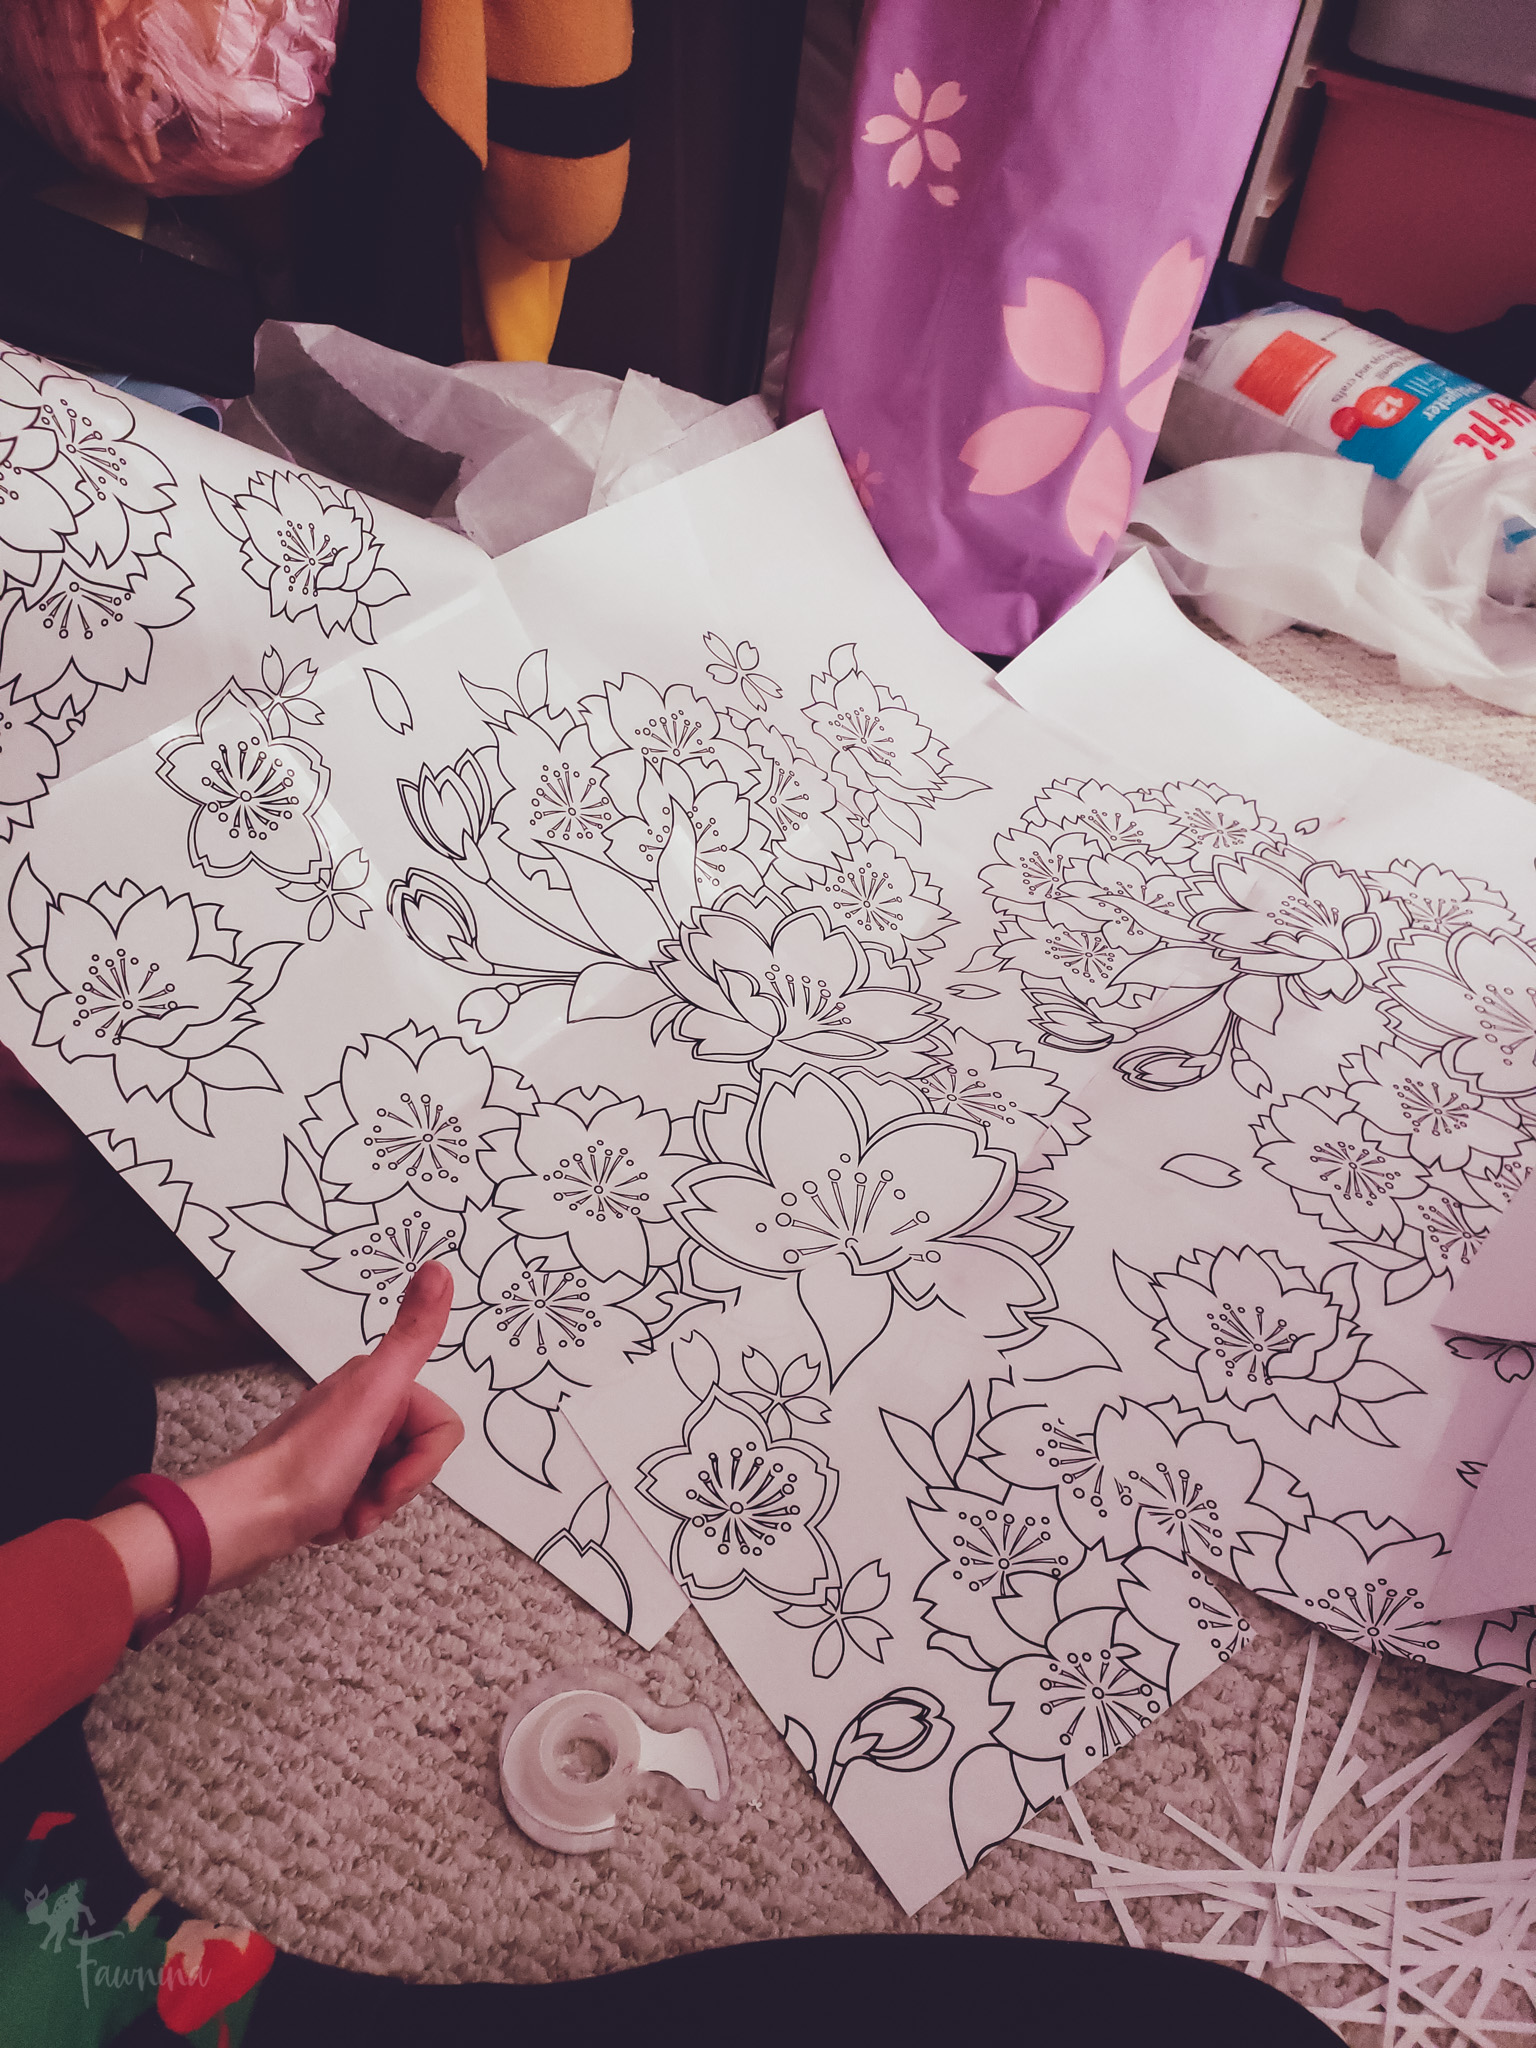
I designed the floral pattern for my robe using Adobe Illustrator. I referenced a number of traditional Japanese fabric prints for inspiration, rather than reinventing the wheel from scratch.

After finishing the designs for the sleeves and robe, I scaled them to the size of my pattern and printed them out using the Poster function in Adobe Acrobat. (I used a 1/2″ overlap.) Once they were printed, it was just a matter of taping the pages together to form the design.
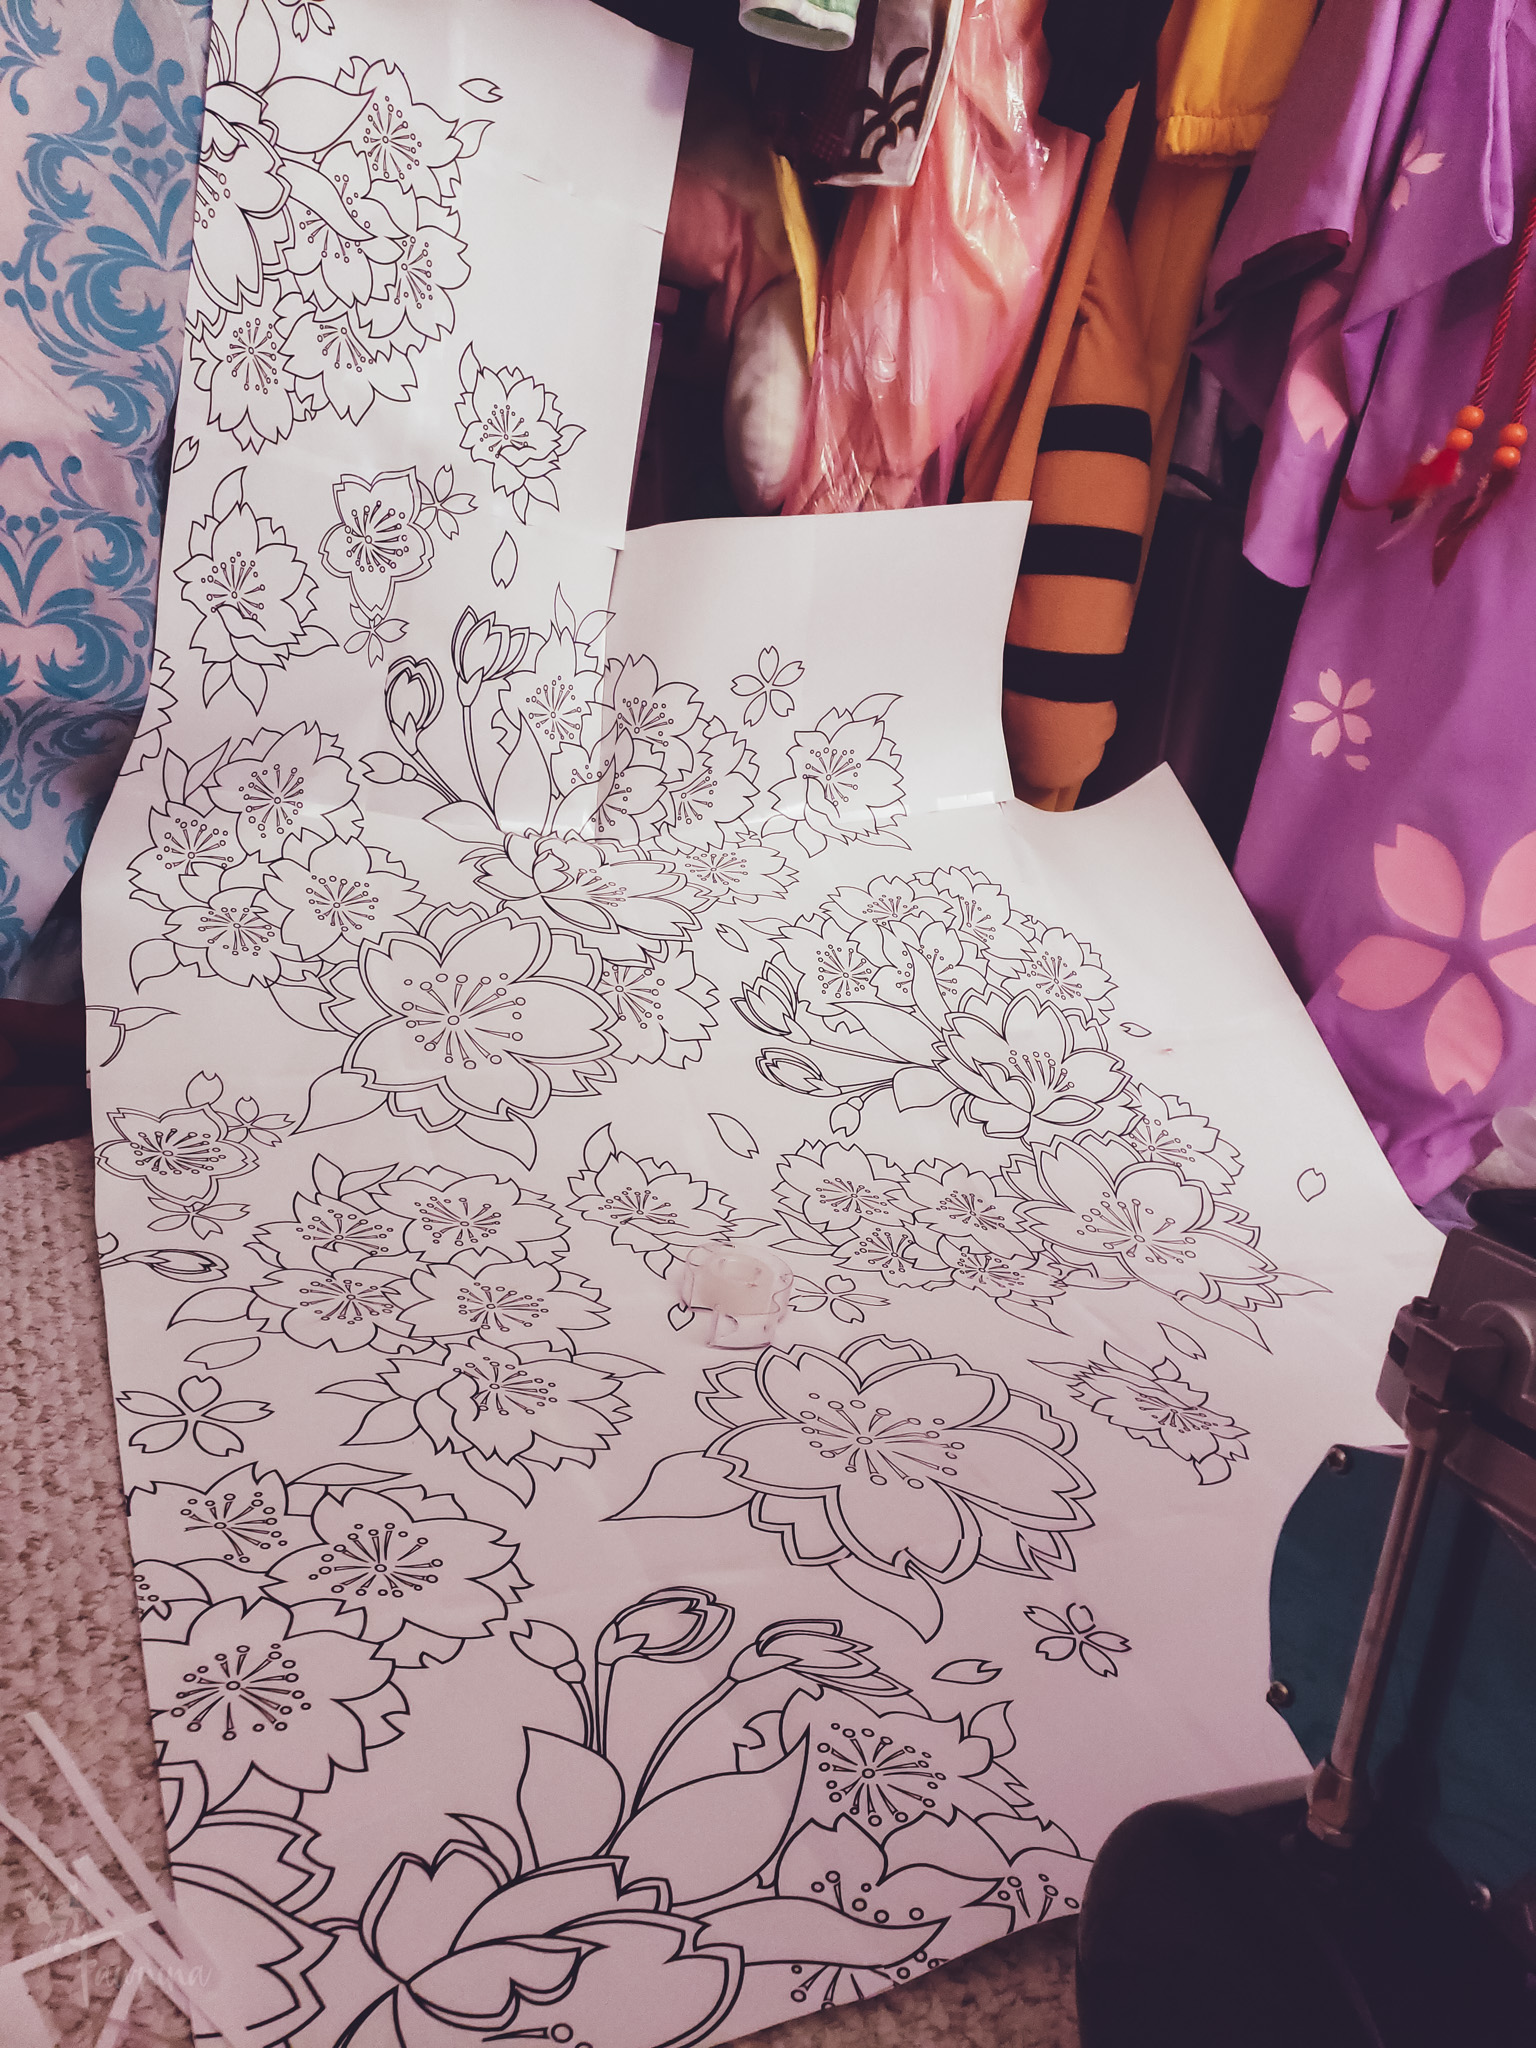
The template for the full robe was much more complicated…
…but one roll of Scotch tape later, and it was ready to go!
Building the Frame
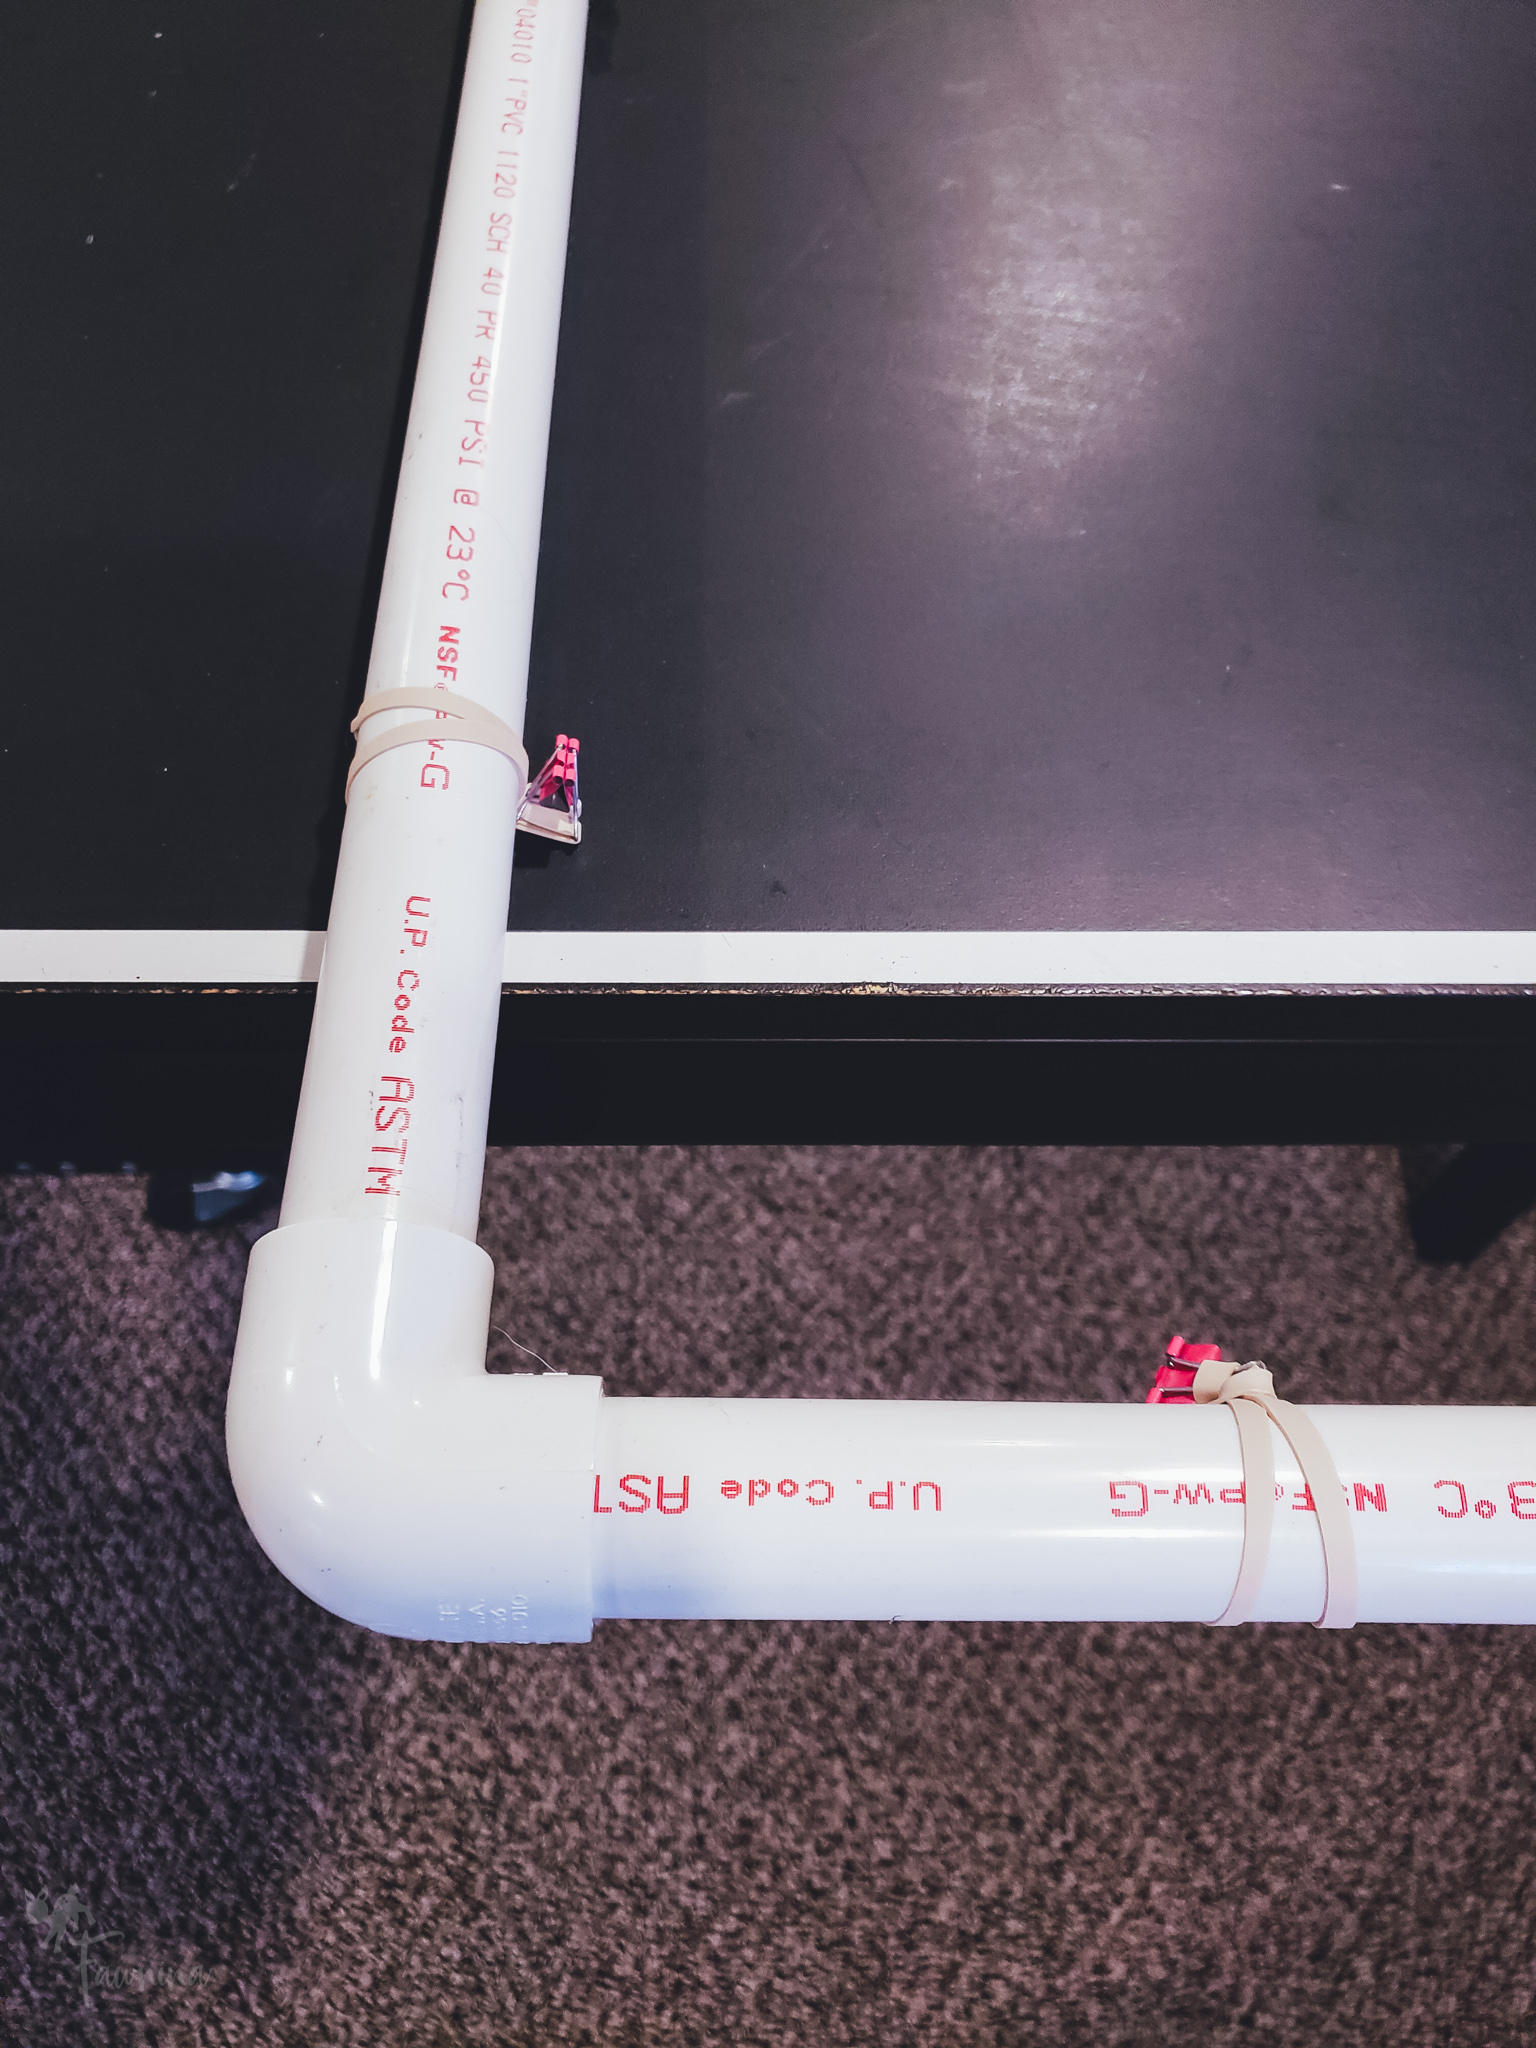
When painting silk, it must be stretched on a frame. Silk painting frames are not cheap and often have limited dimensions. Because I needed to paint such large cuts of silk, I decided to build my own set of frames using PVC pipe.
Each frame consisted of 4 cuts of 1″ PVC and 4 elbow connectors. The finished dimensions of the frame were 3-4″ larger than each fabric piece. This provided room to pull the silk taught when suspended.
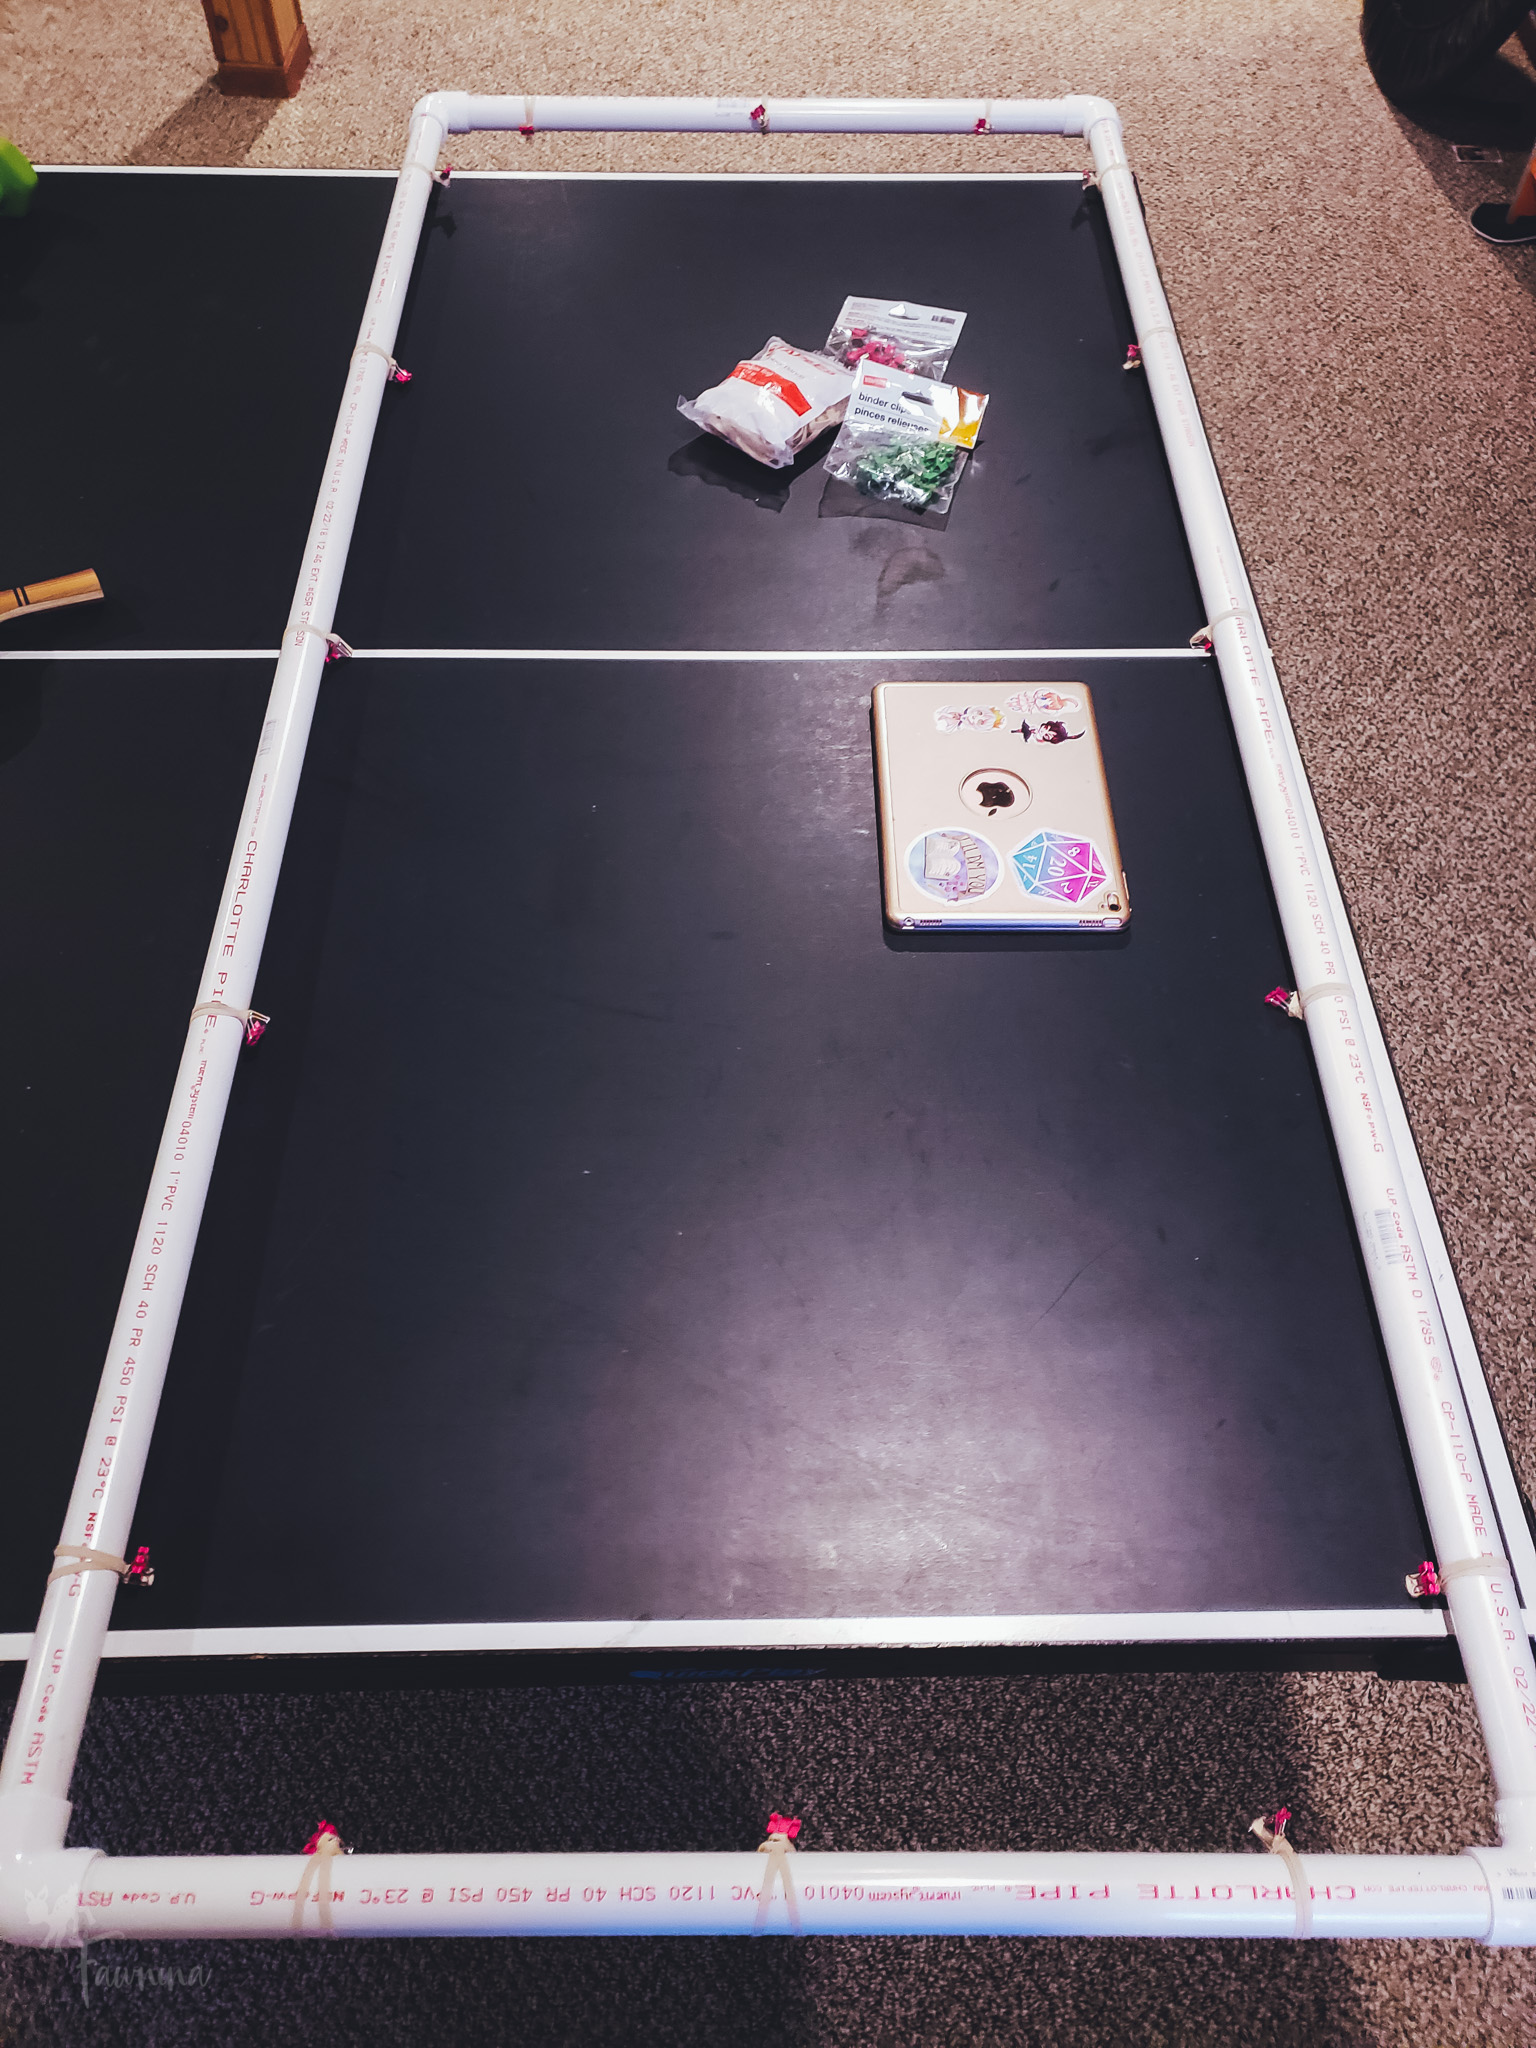
My system for suspending the fabric was both cheap and effective! I attached mini binder clips to rubber bands, then looped those around the PVC pipe frame at regular intervals. I simply clipped the silk in place!
Painting the Robe
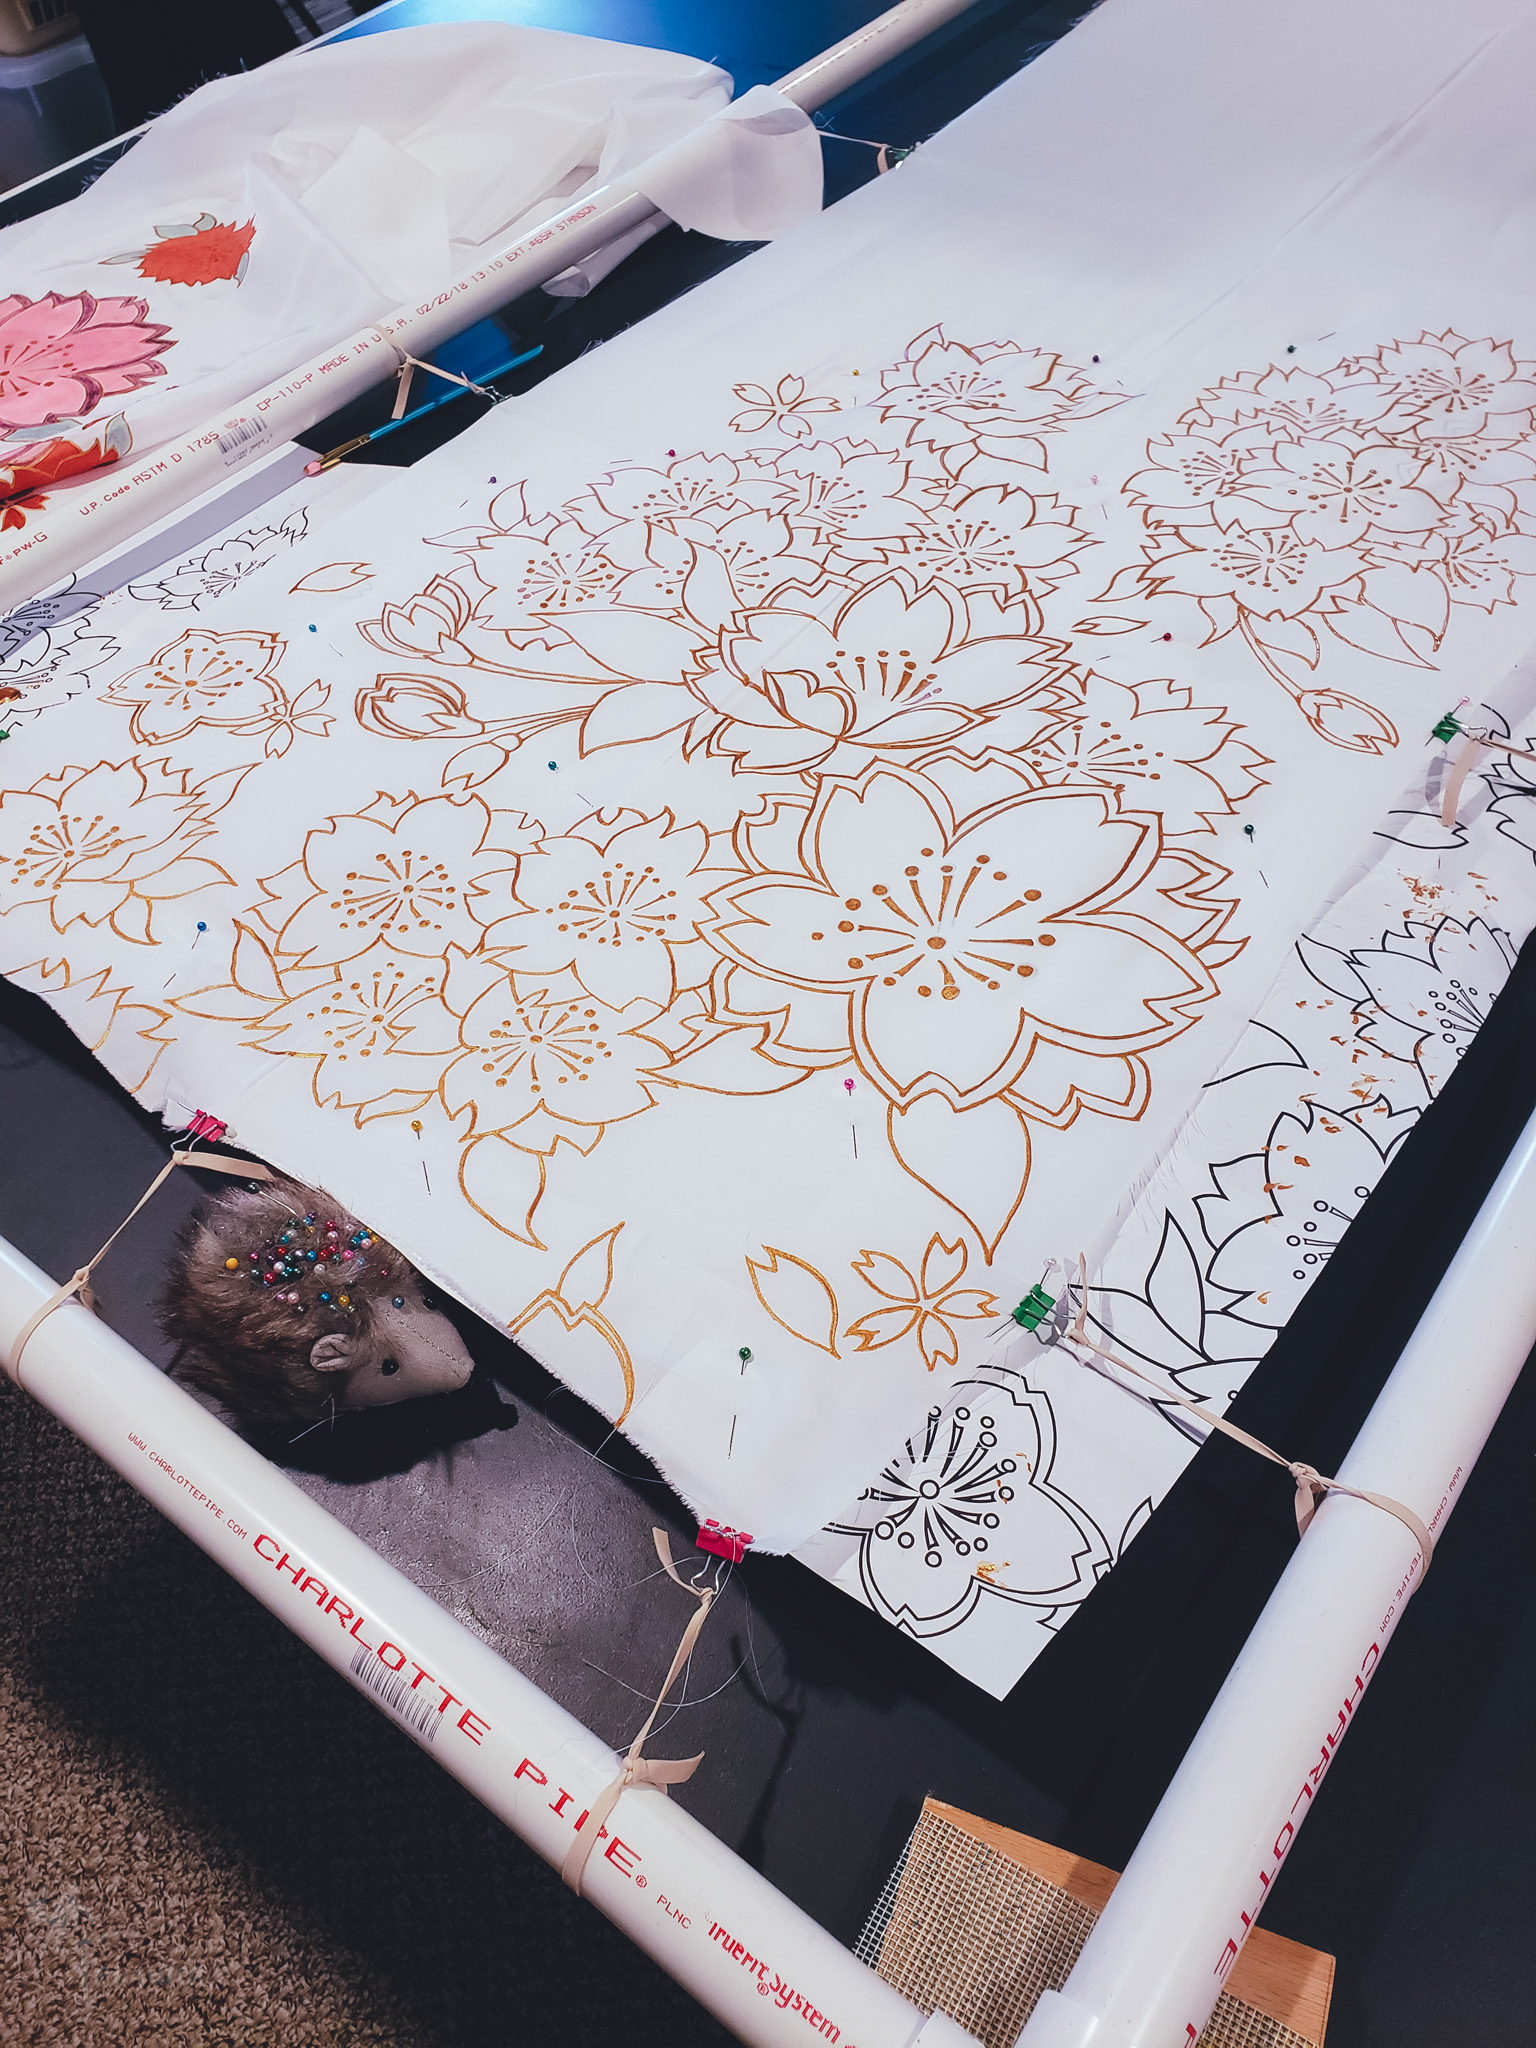
Once I suspended the silk in the frame, I pinned the printed pattern to the underside of the fabric. The habotai I was using was just translucent enough that I could see the printer ink through it. In some places, using my phone’s flashlight function as a backlight came in handy.
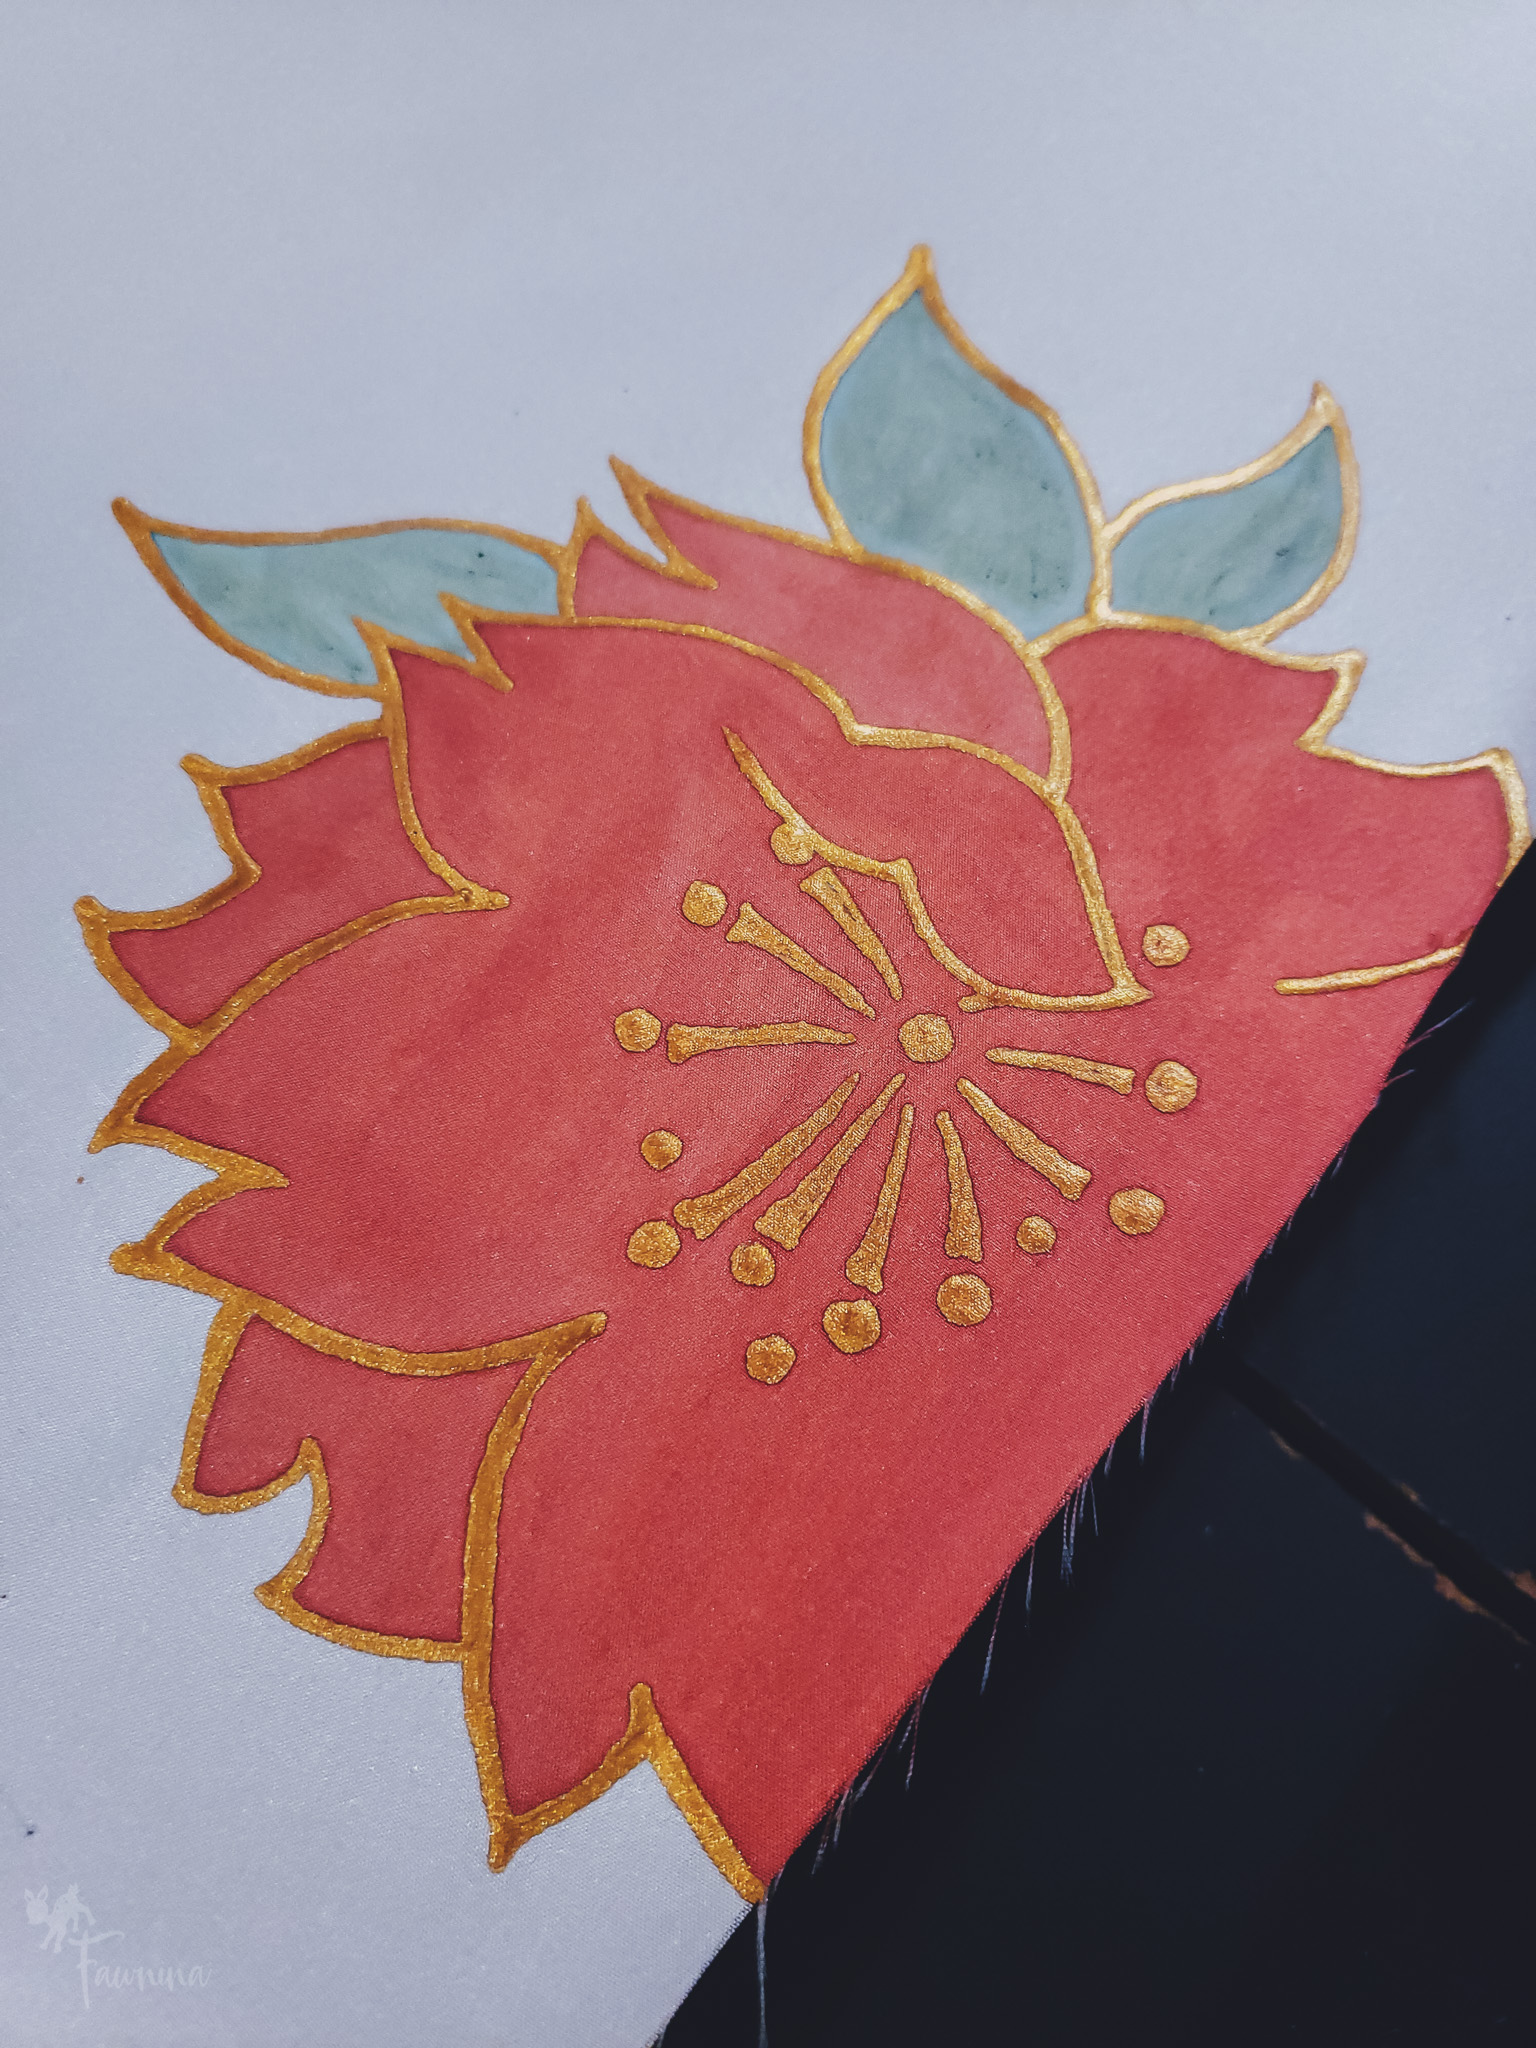
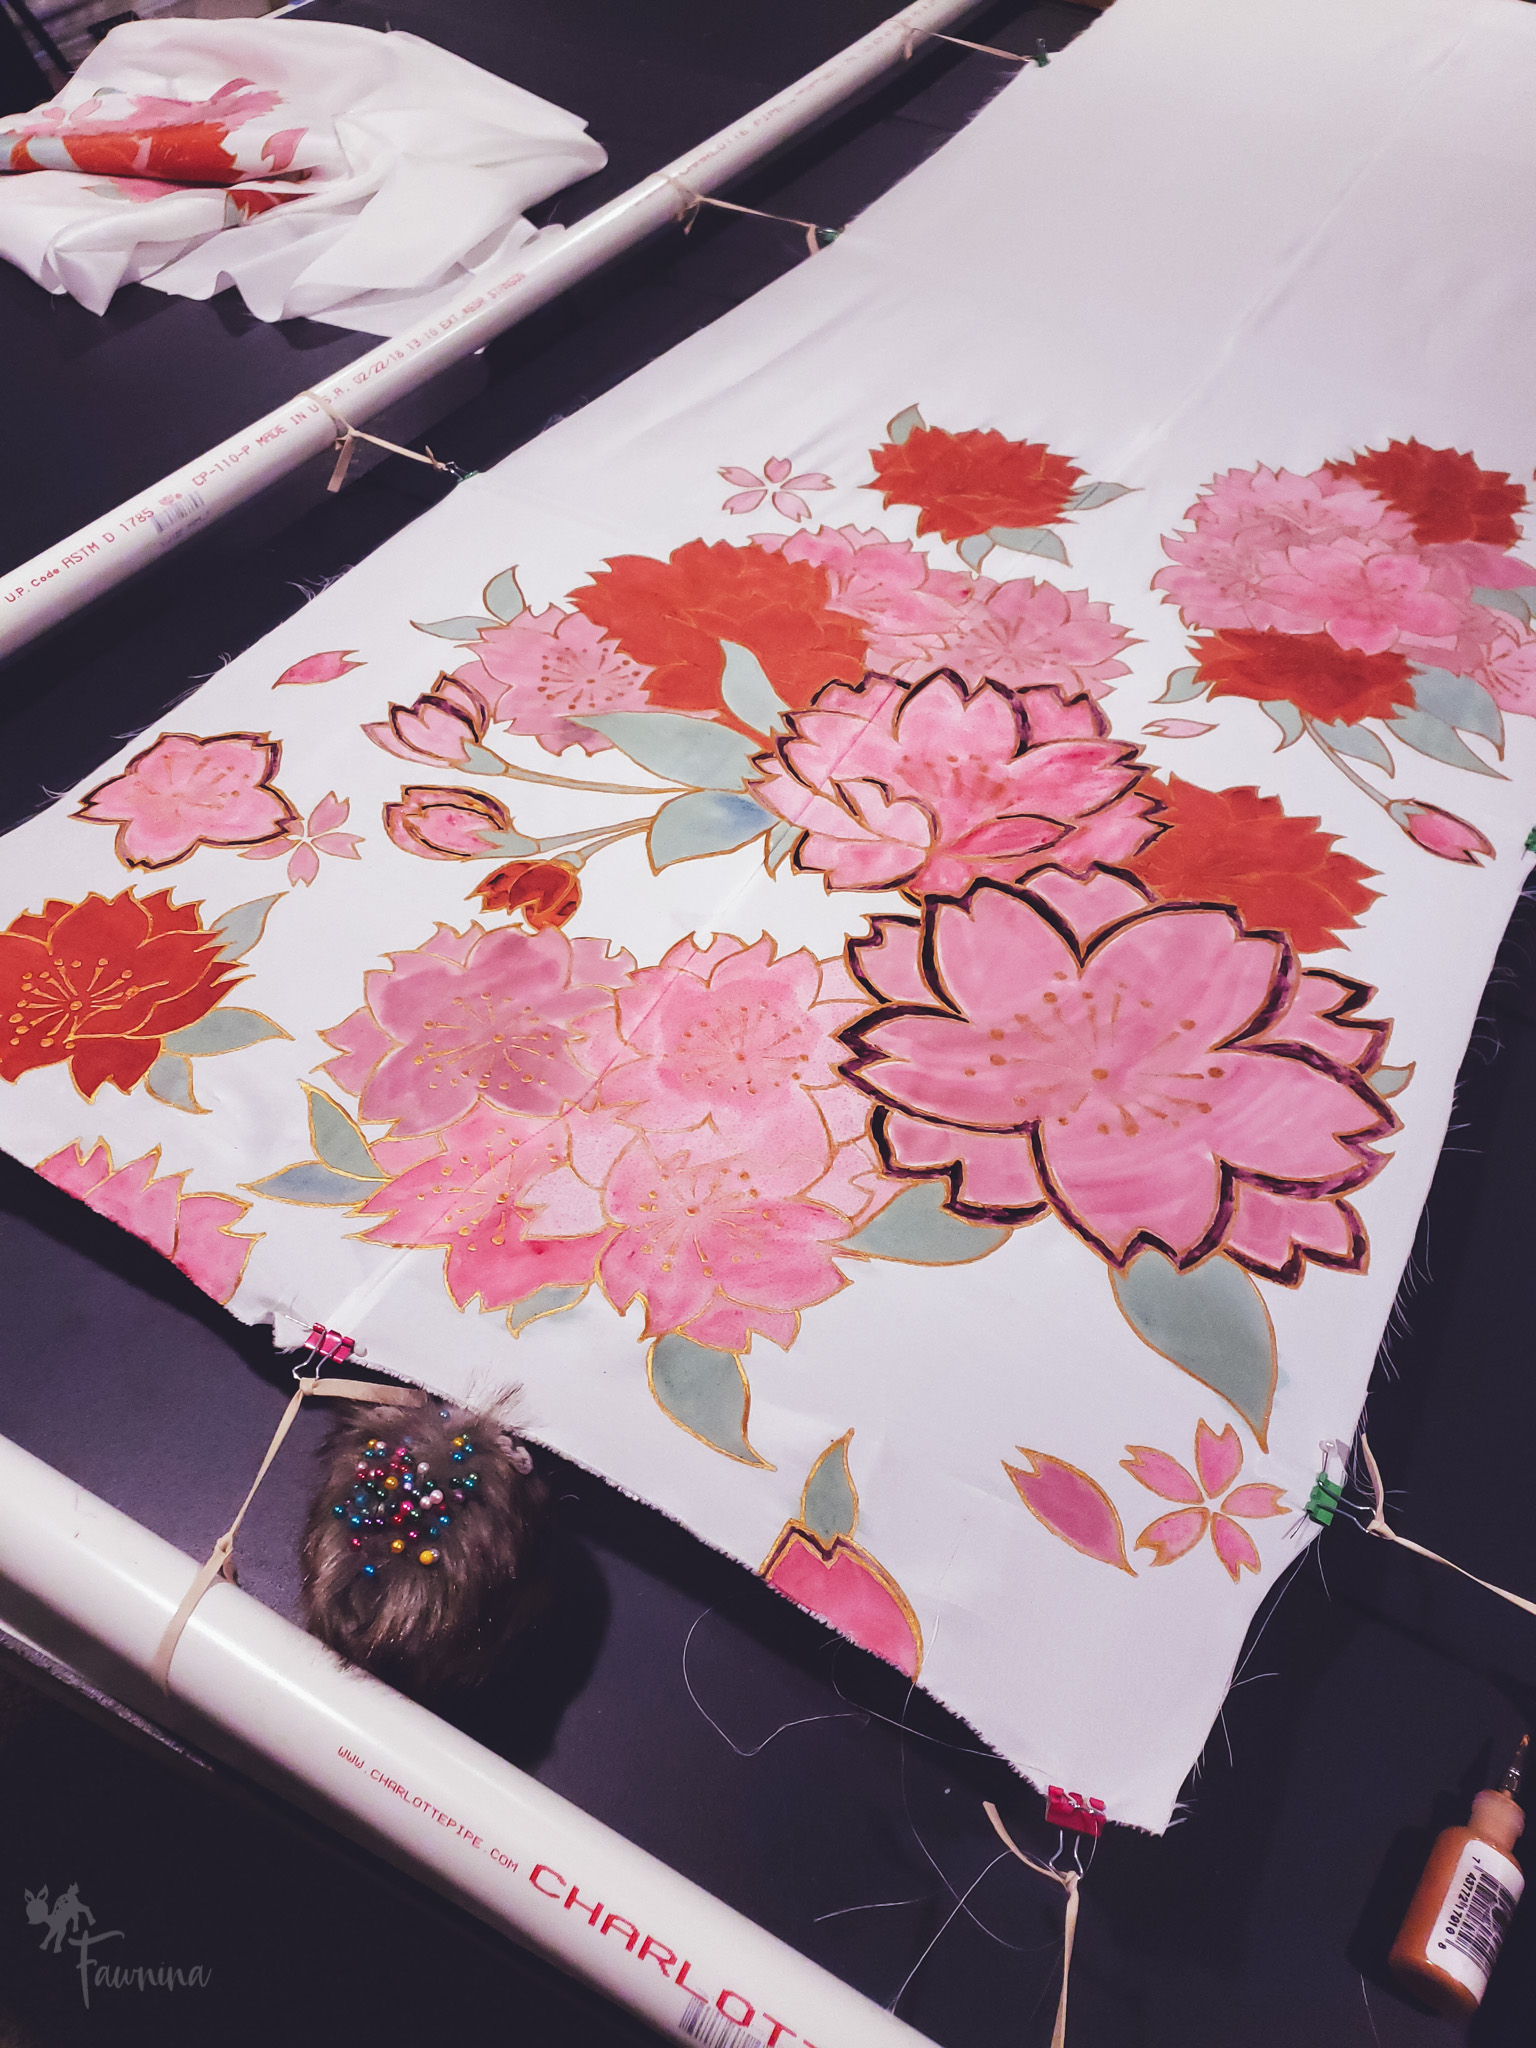
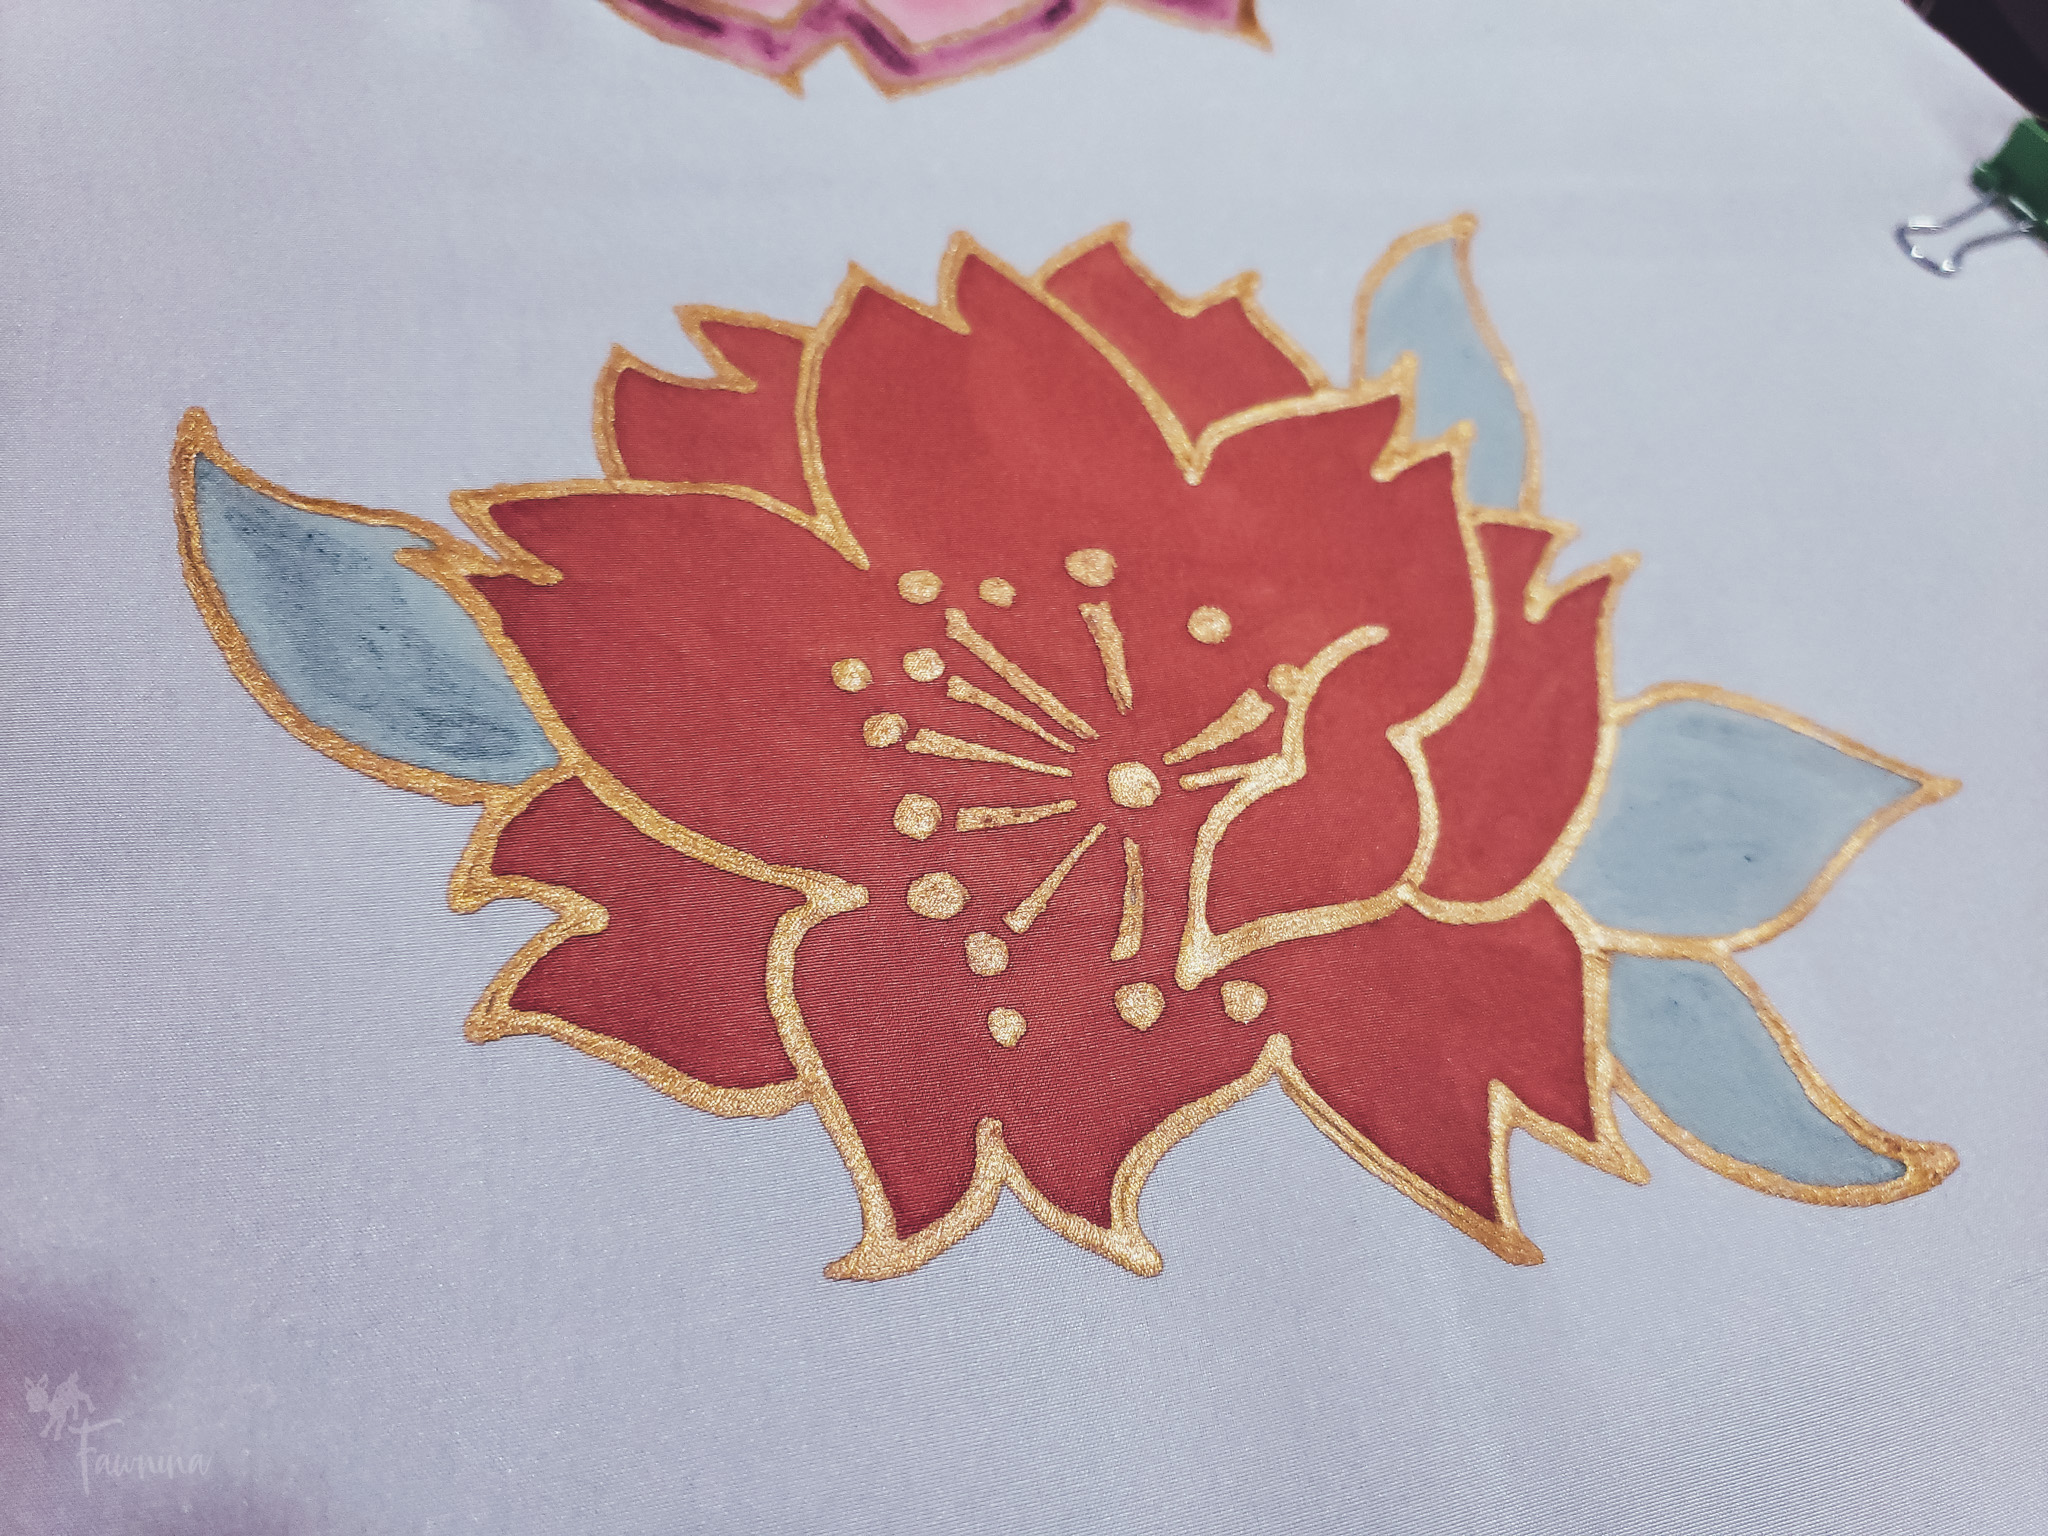
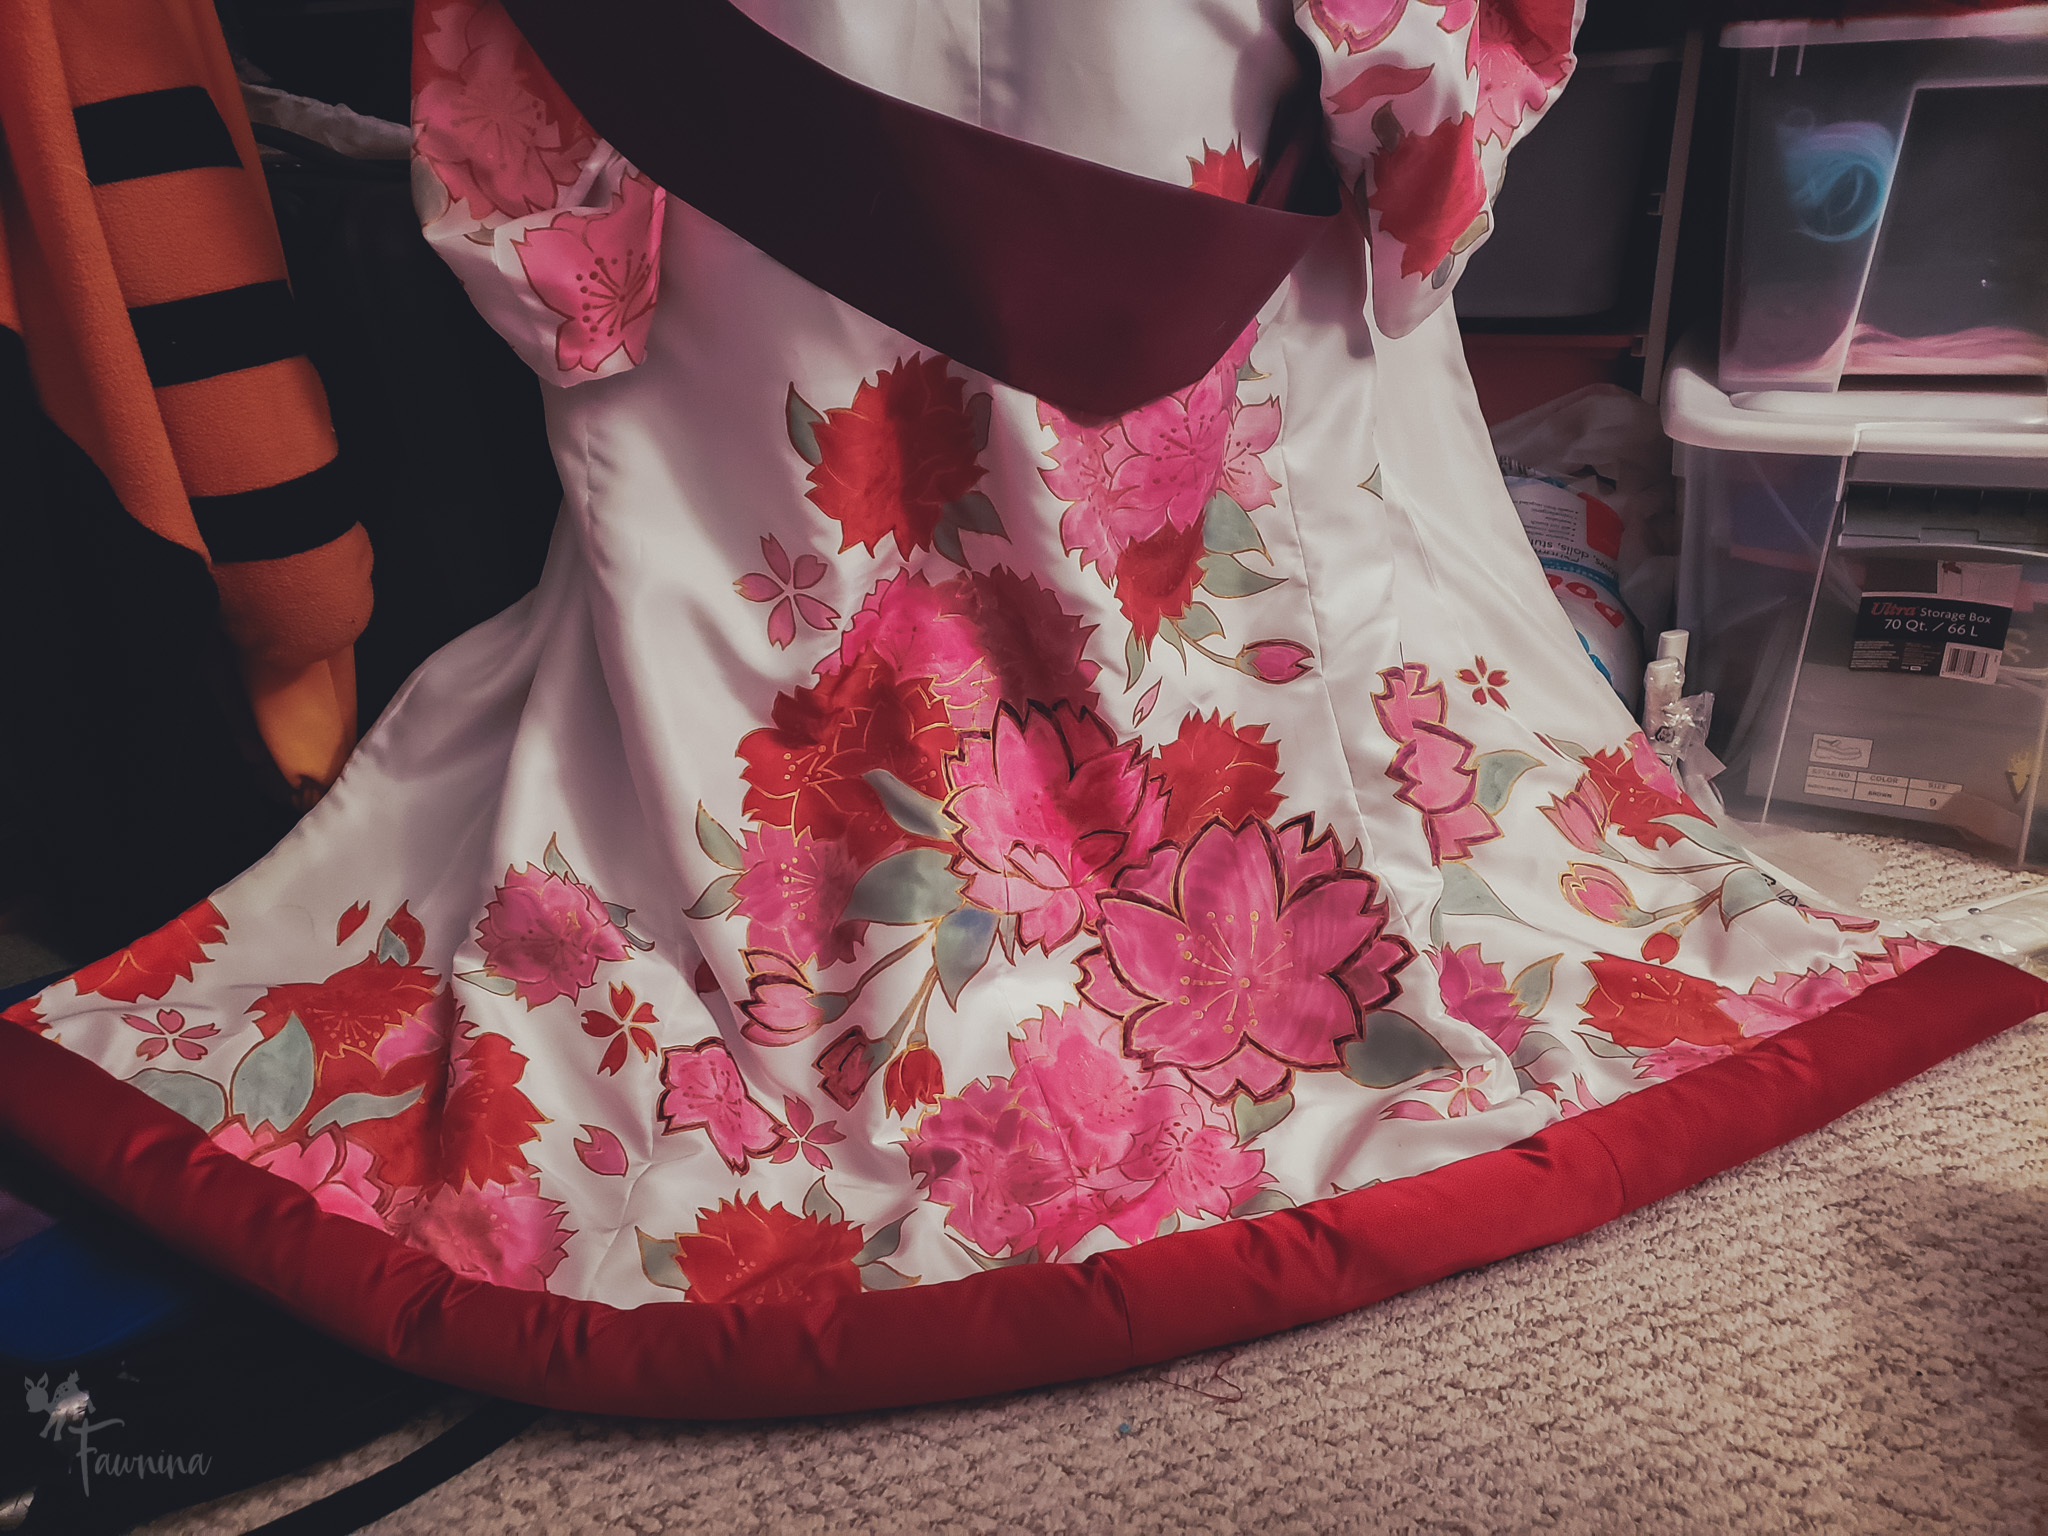
Now came the most slow, tedious part of the process: outlining the design using resist. Some resist is washable: once you’re done painting, you wash off your outline. This leaves only the silk paint behind. Other types of resist, such as the Jacquard Metallics I prefer, remain on the fabric to create something of a “stained glass” effect.
When it comes to silk paints, I prefer using acid dye because I have more freedom to mix colors. I apply it by “dropping” the color onto the fabric with watercolor brushes. It soaks into the silk, stopping at the border created by the resist. (This is, essentially, Paint By Numbers for Grown-Ups.)
I’ll be the first to admit: my application wasn’t flawless. This was largely due to inconsistencies with how much water I was adding to my acid dyes. Due to working full-time, I had to break up my painting sessions over the course of several evenings. I mixed fresh batches per session, and though I carefully tracked my dye ratios, I wasn’t as careful with water. (Definitely a lesson for the future… OTL)
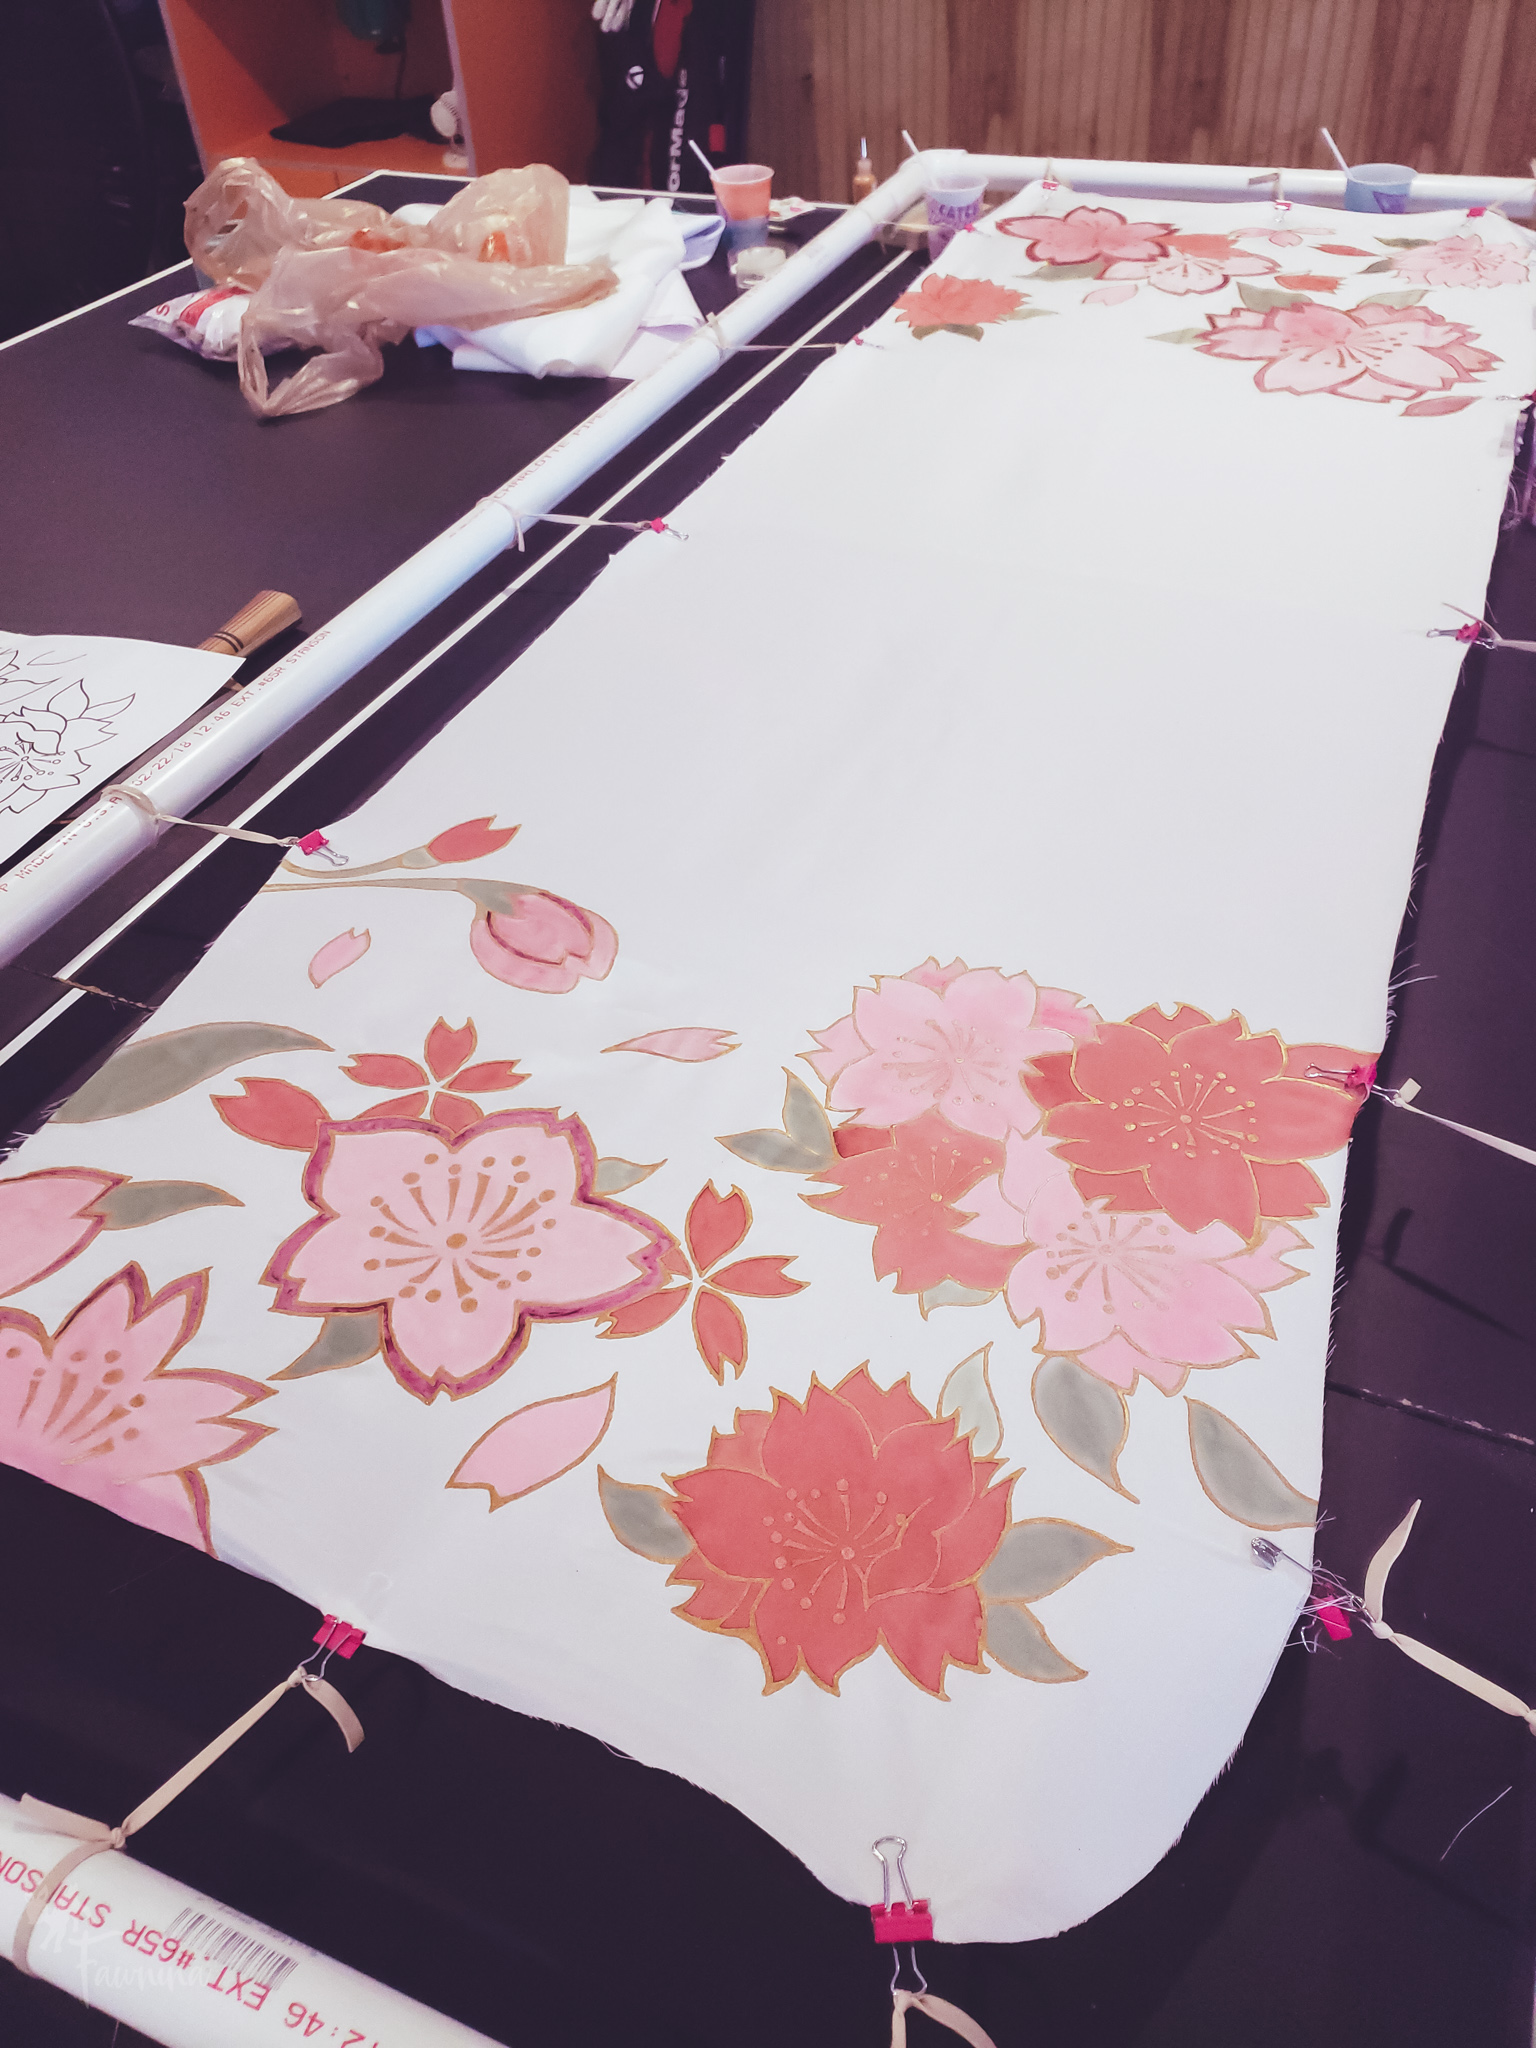
However, this did create a rather charming watercolor effect. It wasn’t what I intended, but I ended up kind of loving the results!
After the last drop of color was added, I allowed the paint to set for 24 hours. When it was completely dry, I set the paint and the resist using my iron (with a press cloth in-between to protect the fabric).
The most challenging part of the costume was done! I constructed the robe using similar methods used for the yukata (see: lots of rectangles and straight lines). I lined the sleeves with white peachskin, and I backed the body of the robe with peachskin to ensure the silk did not appear translucent. It was additionally lined with red bridal satin, as is commonly seen in traditional uchikake.
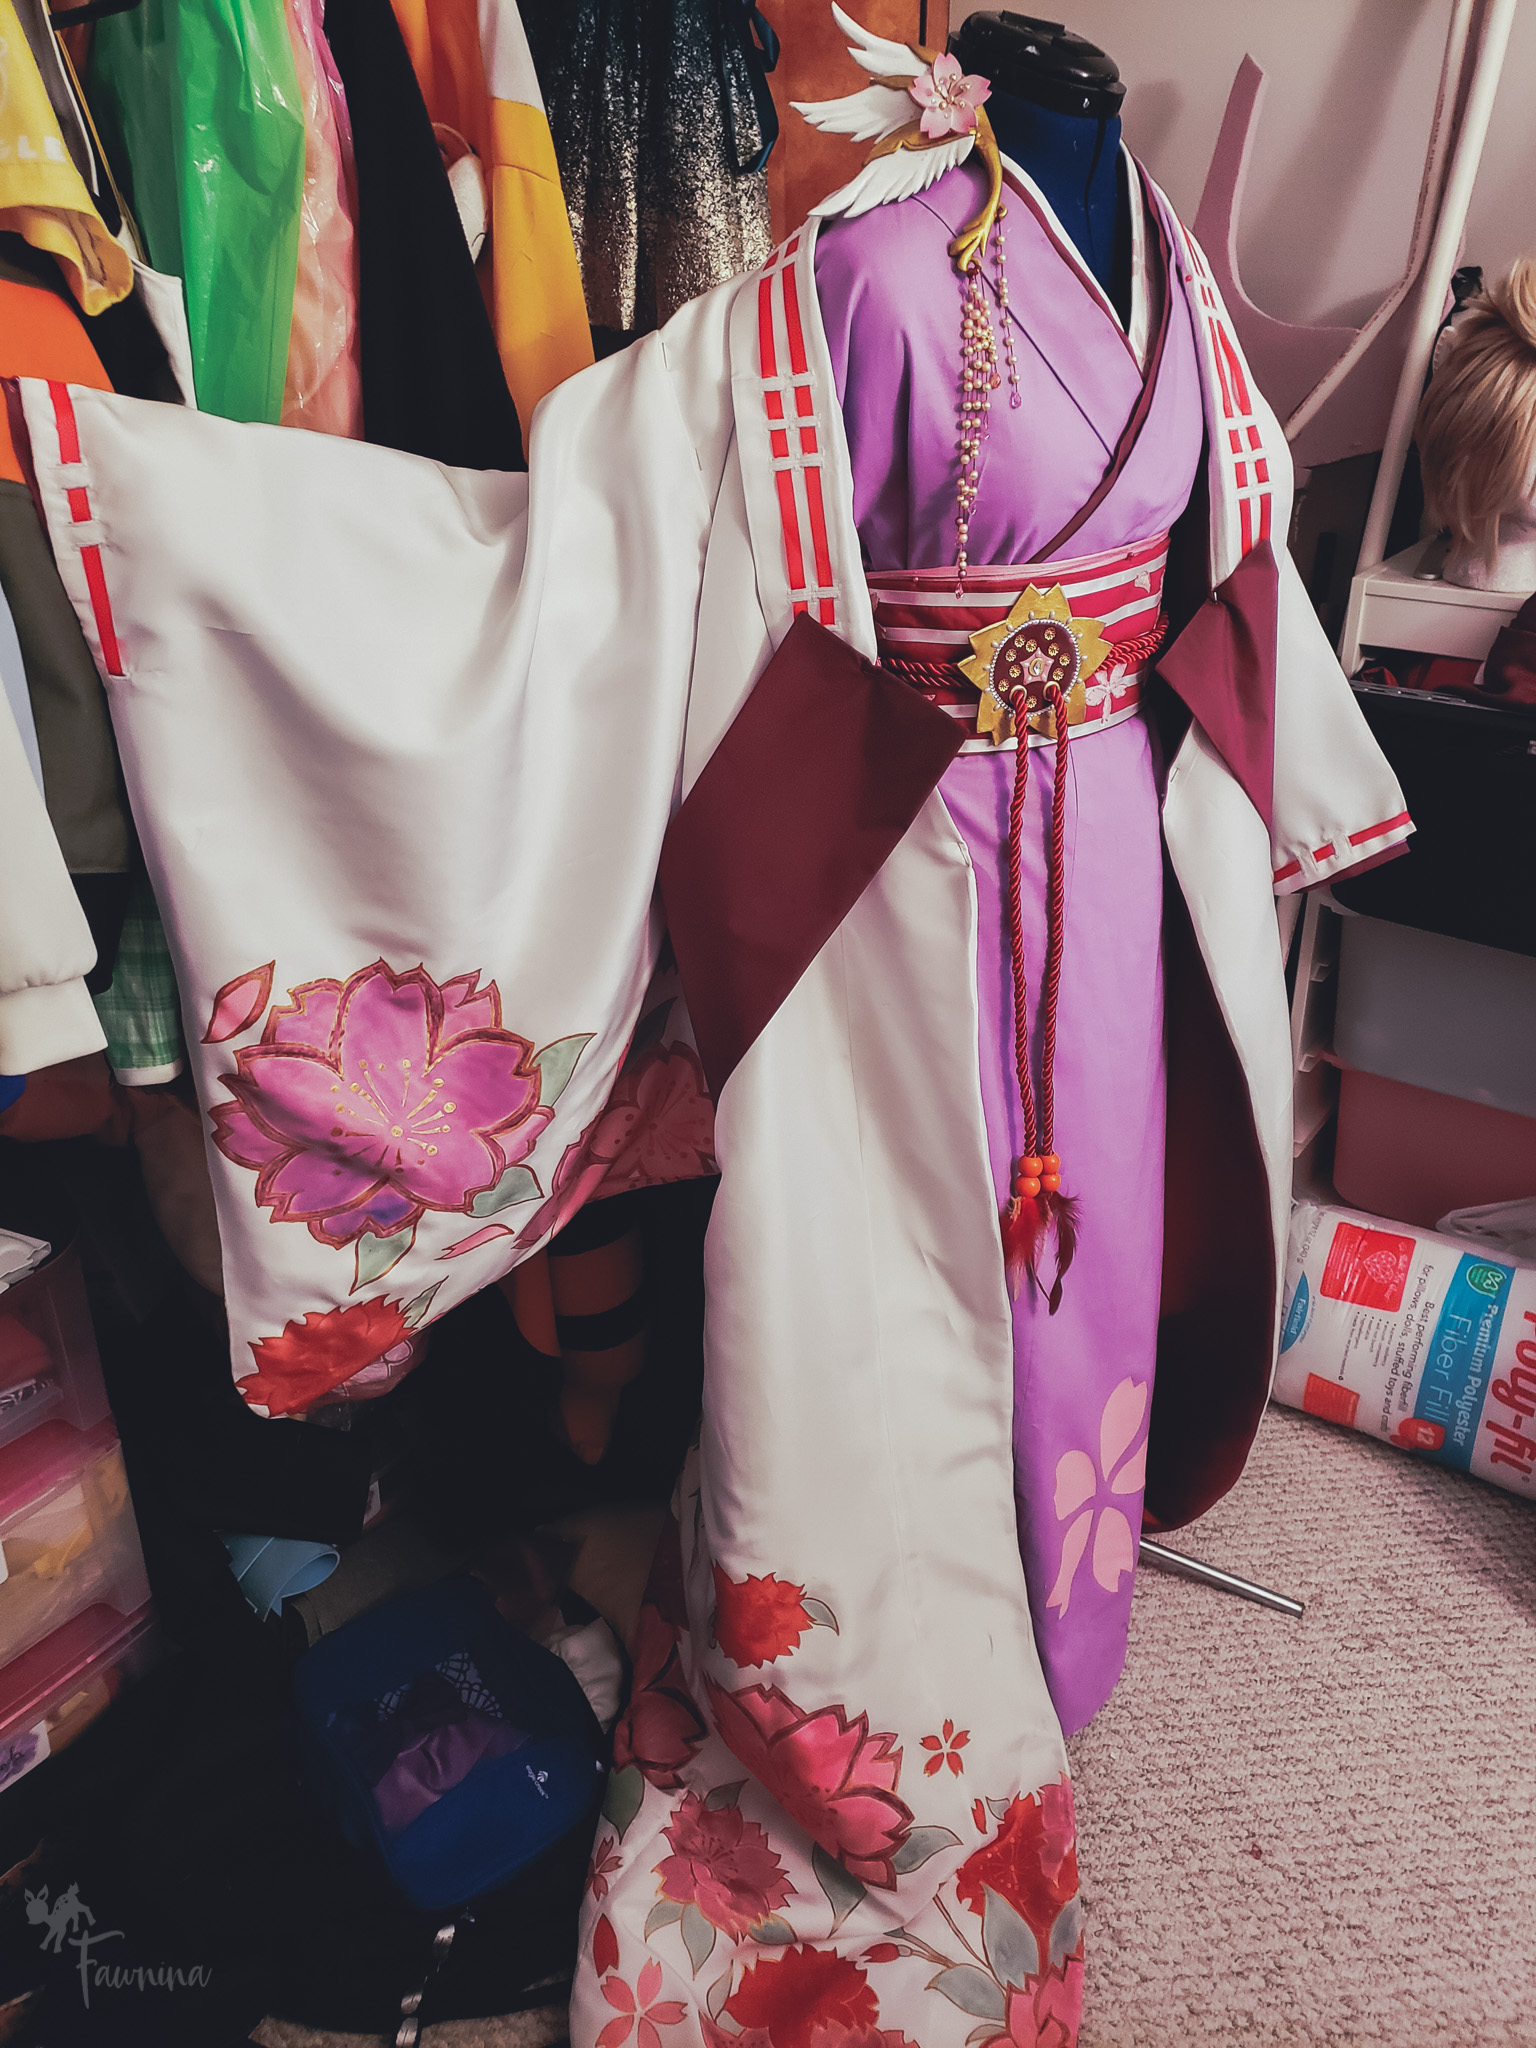
I finished the robe with a padded hem to allow it to drape properly, as per traditional uchikake construction.
And with that, Sakura was ready for Katsucon ’19! Overall, I’m incredibly proud of this project. While it isn’t flawless, I can see development from my first attempt on Yona… and that’s a good feeling. It’s important to celebrate our small victories as artists, even if there’s still room for further improvement!

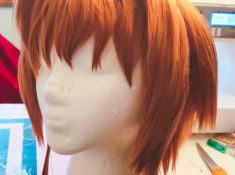 Sakura Wig Tutorial
 Sewing Anastasia’s Bodice, Sleeves, & Bows
 Anastasia’s Kokoshnik Tutorial
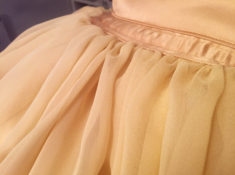 Making the Skirts for Anastasia’s Ballgown